How to Set Up OpenDNS on Your Wi-Fi Router

Looking for a faster, safer, more reliable Internet experience? OpenDNS gives it to you for free without additional software or hardware.
 Your router is the gateway between all the computers and mobile devices in your home and the Internet. OpenDNS is a free service that makes that gateway a lot smarter and a lot safer. It does so by replacing your ISP’s DNS resolution service with a faster, more customizable alternative. With OpenDNS, you’ll be able to:
- Boost the speed and reliability of your web browsers
- Track web activity on your home network
- Block and filter web content (including specific websites and domains)
The free version of OpenDNS lets you do all of this without software or “hacks” that might enrage your ISP. OpenDNS is 100% legit and widely utilized in the business and education world. So, why not use it in your home?
We could get into how OpenDNS works, but I’m betting you don’t care about reading the above benefits. So, let’s get right into it.
Setting up OpenDNS on a Home Network
For home users, OpenDNS can be configured on a computer or a router. If you have multiple computers in your home, it makes the most sense to set it up on your router. That way, all Internet traffic on your home network will see the benefits.
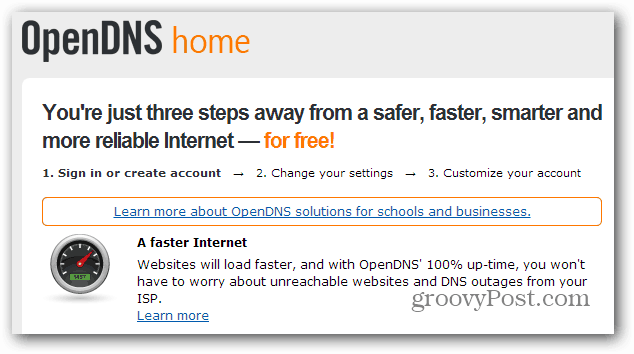
First, go to OpenDNS.com and register an account. OpenDNS offers many other services, but what you are looking for is the OpenDNS Home Free version. Click here to jump straight to the signup page.
After registering, you’ll have the option to choose a Computer, Router, or DNS Server setup. Choose Router.

Choose your router’s make and model from the options. This will give you step-by-step instructions for setting up your router with OpenDNS.

The instructions for each router will vary slightly. But basically, you’ll be going into your router’s setup page and changing your DNS servers to:
- 208.67.222.222
- 208.67.220.220
After setting up your router, you’ll also want to check your email for a confirmation link from OpenDNS. Click that, and you’ll be taken to your OpenDNS dashboard.

The next thing you’ll want to do is add your home network to your OpenDNS account. To do this, click Settings. Your IP address will be automatically detected. Just click Add this network. (Note this screenshot is just an example. Don’t change what’s shown on your screen.)

On the next screen, give your network a name (it doesn’t matter what). For the vast majority of users, you’ll also check the “Yes, it is dynamic” box. This is especially true for home users. If you are in a school or office, you can ask your systems administrator if you have a dynamic or static IP address.

If you have a dynamic IP address, it’s an excellent idea to download the OpenDNS Updater. This lightweight service runs on one of your computers and keeps your IP updated on your OpenDNS account. Otherwise, you’d have to do this manually from your OpenDNS dashboard, and you’d lose your OpenDNS benefits whenever your IP address changed (as dynamic IP addresses occasionally do).
Once you’ve done all that, click Done.
The next step is to test to see if OpenDNS is working. To do that, go to welcome.opendns.com. You should see a screen that looks like this:

If you don’t, try some of the troubleshooting steps below.
With OpenDNS set up, you should immediately see the benefits of OpenDNS’s huge caches of domain names (increasing speed and reliability) and built-in protections against known phishers and phonies on the web. If you want more details on what OpenDNS is doing, read about how OpenDNS works. For more info on tracking web activity and filtering web content (parental controls) with OpenDNS, stay tuned…
How OpenDNS Works
Without getting too deeply into the technical nitty-gritty, here’s how OpenDNS works:
DNS stands for Domain Name System. This is the service on the Internet that takes the domains you type into your browser (groovyPost.com, Facebook.com, Google.com) and translates them into the IP addresses that correspond to the physical server where these websites are located (64.90.59.127, 69.171.229.14, 74.125.137.100). Without DNS, you would have to type in the actual IP addresses whenever you wanted to access a website. To see what I mean, try punching http://74.125.137.100 into your web browser and see where it takes you.
By default, DNS is handled by your ISP. For example, if you have Comcast, all your Internet requests go through Comcast’s DNS servers before getting to the actual website you are trying to reach. If you have FiOS, you’ll use Verizon’s DNS servers. Most DNS servers are pretty plain vanilla; one size fits all affairs. They resolve domain names and not much else.
More on OpenDNS
OpenDNS is an alternative to these generic “dumb” middleman DNS servers. OpenDNS is still an intermediary between you and the Internet, but it’s more like a concierge than a middleman. By tweaking a few settings in your router or on your computer, you can skip your ISP’s DNS servers and use OpenDNS instead. Once you register an account with OpenDNS, you can tell the service how to manage your DNS requests from your OpenDNS dashboard. First and foremost, you can have OpenDNS protect you from known phishing sites as well as botnets and malicious malware. But you can also choose to filter unwanted content, such as pornography, illegal activity, and social networking sites.
We’ll show you how to do all that in a few other tutorials. But for now, enjoy your faster web browsing (thanks to OpenDNS’s domain caching) and a safer internet!
Help and Troubleshooting
Changing your router DNS settings can take a few moments to kick in. To speed things along, you can flush your DNS cache, rebooting your computer, or restarting your router (make sure you don’t do a factory reset or a hard reset, as this will undo your new DNS settings).
Personally, I had trouble getting my Airport Extreme to start logging stats and blocking domains, even after doing the above steps. Others have reported that changing your Configure IPv4 setting to Manual instead of Using DHCP helps, but for me, I walked away for a couple of hours and came back, and it magically started working.
If you haven’t already, I also recommend downloading the OpenDNS Updater utility.
If you are using DD-WRT or another third-party firmware, DNSMasq has been known to cause trouble with OpenDNS. Read this for more info.
If all else fails, post a comment here or visit the OpenDNS Support page.


Henry
Hi, I’m on a Mac OS 10.8.2 in France and want to use OpenDNS. I have a “Livebox” (my ISP) as my router. In the router’s DCHP configuration panel “Activate the DCHP server” is checked. In the DNS configuration panel, where I can set the primary and secondary DNS and manually configure the host, it warns me that if I have a telephone service included, which I have, I should not change these settings. I should leave “via DCHP” checked.
Are they correct?
Clint
How does this work for people who use the Wi-Fi network off and on? For joining purposes?
Tom
Is Open Dns better than Google DNS or the best one out there.
Sludge Hound
Got it set up to use Computer not Router since bit trouble connection Netgear site. Set PC to both IPv4 & IPv6 values since router goes right to PC alone. Appears to open/close various sites in a snap compared to cable ISP Spectrum. Use for now.
Have tried the others. Google DNS ok but none as snappy as OpenDNS now. Course I had gone back to ISP default values (blanks) but since it was getting laggy thought try this on MS Edge. See Cisco has a hand in all this now. Thanks.