How to Use Nearby Sharing on Windows 11

A quick and easy method for sharing files and links between local devices on Windows 10 or 11 is to use Nearby Sharing. Here’s how to use it on Windows 11.
Windows 11 offers a Nearby Sharing feature that allows you to transfer links, documents, photos, and other files to nearby compatible devices. The technology uses a combination of Bluetooth and WiFi communication, so devices need to be relatively close to each other.
The feature isn’t new—Nearby Sharing was introduced in Windows 10 version 1803 back in 2018. Windows 11 builds on this feature, making it easier to send items to different devices across your network. You might find it useful to share files from your PC to your laptop, for instance.
If you want to use Nearby Sharing on your Windows 11 PC, here’s what you’ll need to do.
Use Nearby Sharing on Windows 11
To use this feature, both devices need both Bluetooth and Nearby Sharing features enabled. You can transfer files and links between Windows 10 and Windows 11 devices.
To enable the Nearby Sharing feature on Windows 11, follow these steps:
- Open the Start menu by pressing the Start button or the Windows key.
- In Start, press Settings.
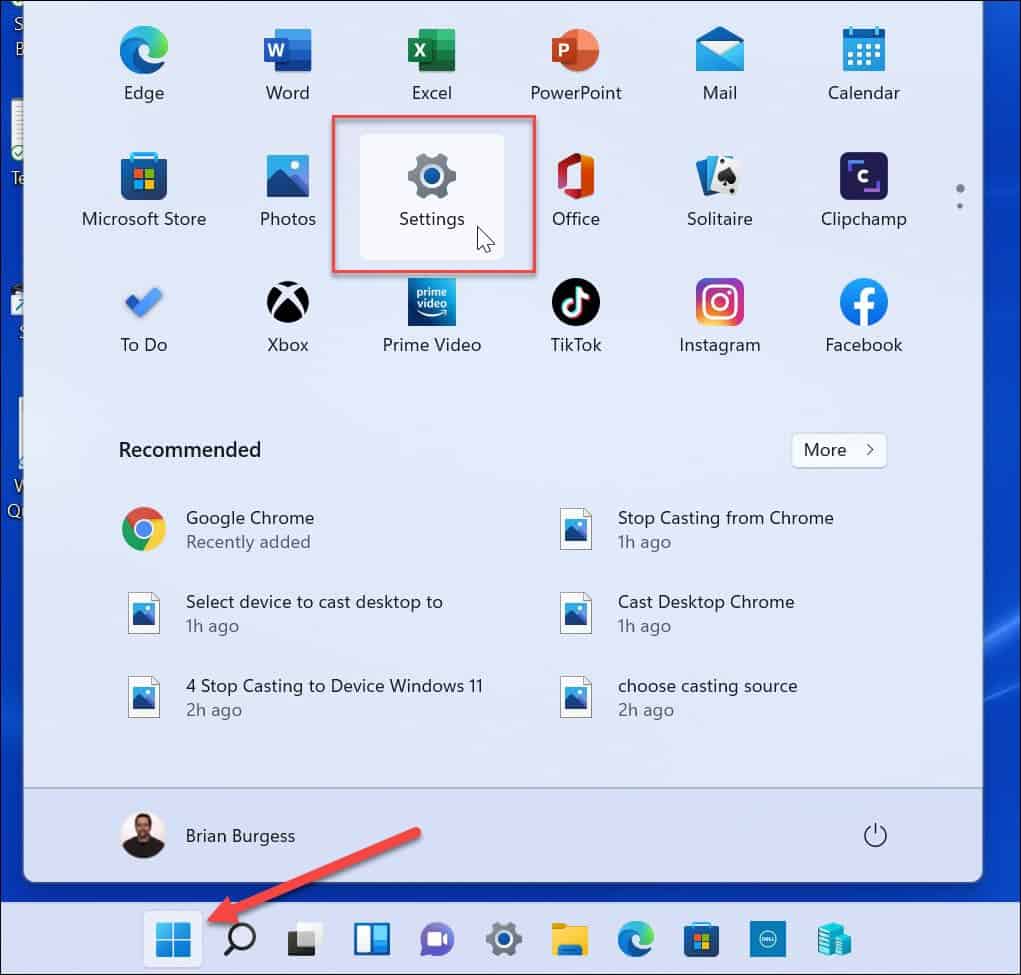
- In the Settings menu, click System on the left, then press Nearby sharing on the right.
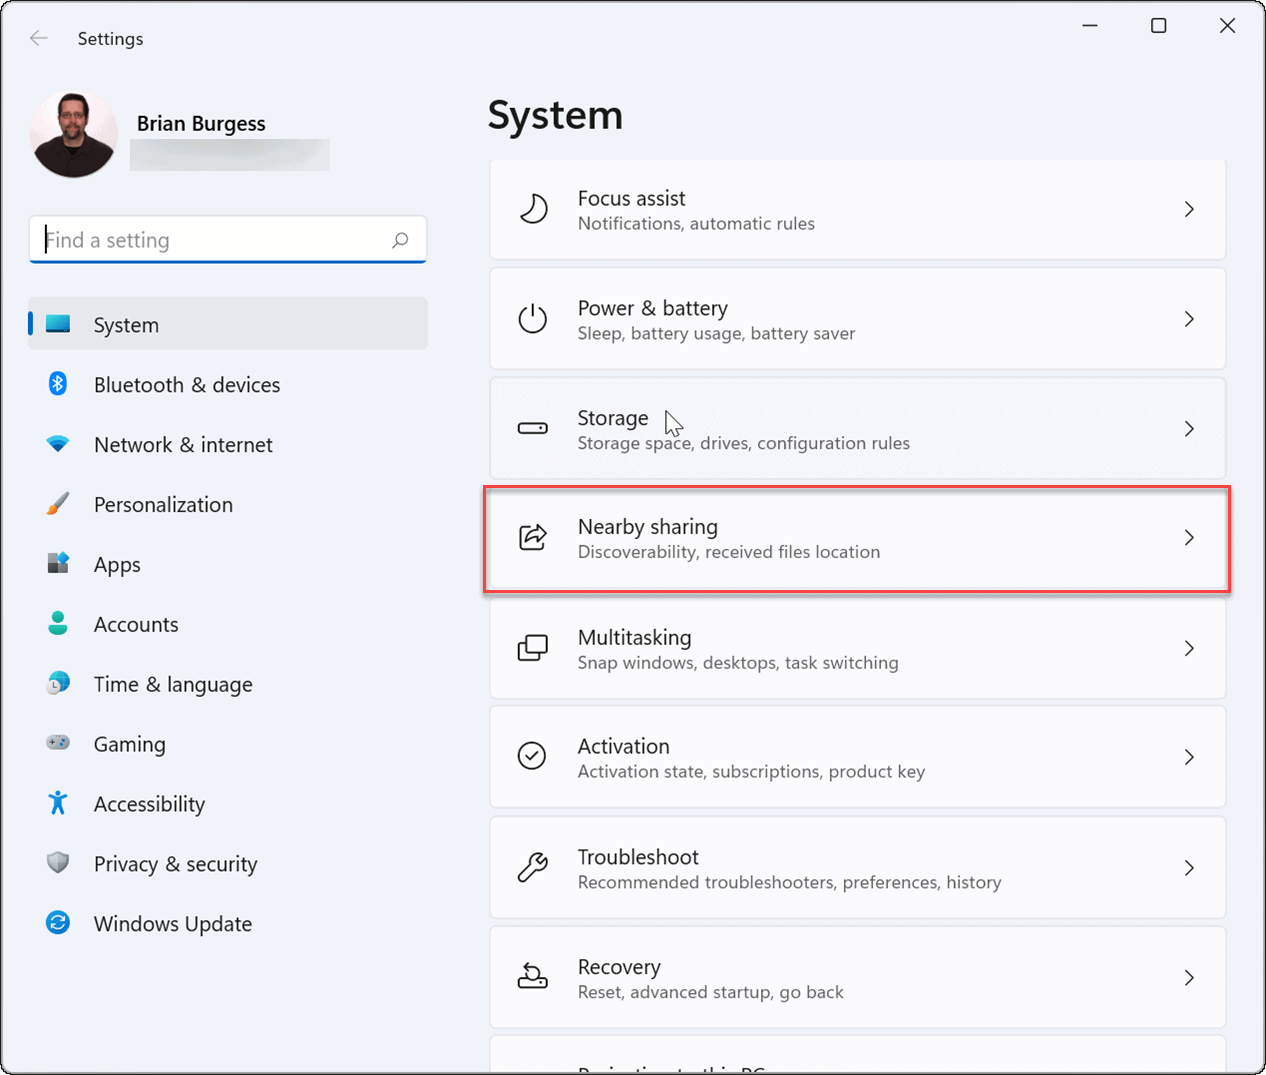
- Select which Nearby sharing option you wish to use. There are three options available to you:
- My devices only: Allows file sharing between PCs using the same Microsoft account configuration.
- Everybody nearby: Provides easy file sharing with any nearby devices.
- Off: Disables the Nearby sharing feature.

- Once you’ve enabled Nearby Sharing, exit the Settings menu.
How to Add Nearby Sharing to Quick settings
If you want to be able to quickly enable or disable Nearby Sharing, you can add the feature to the Quick settings menu on your taskbar.
To add Nearby Sharing to the Quick settings menu:
- Use the keyboard shortcut Windows key + A to open Quick settings.
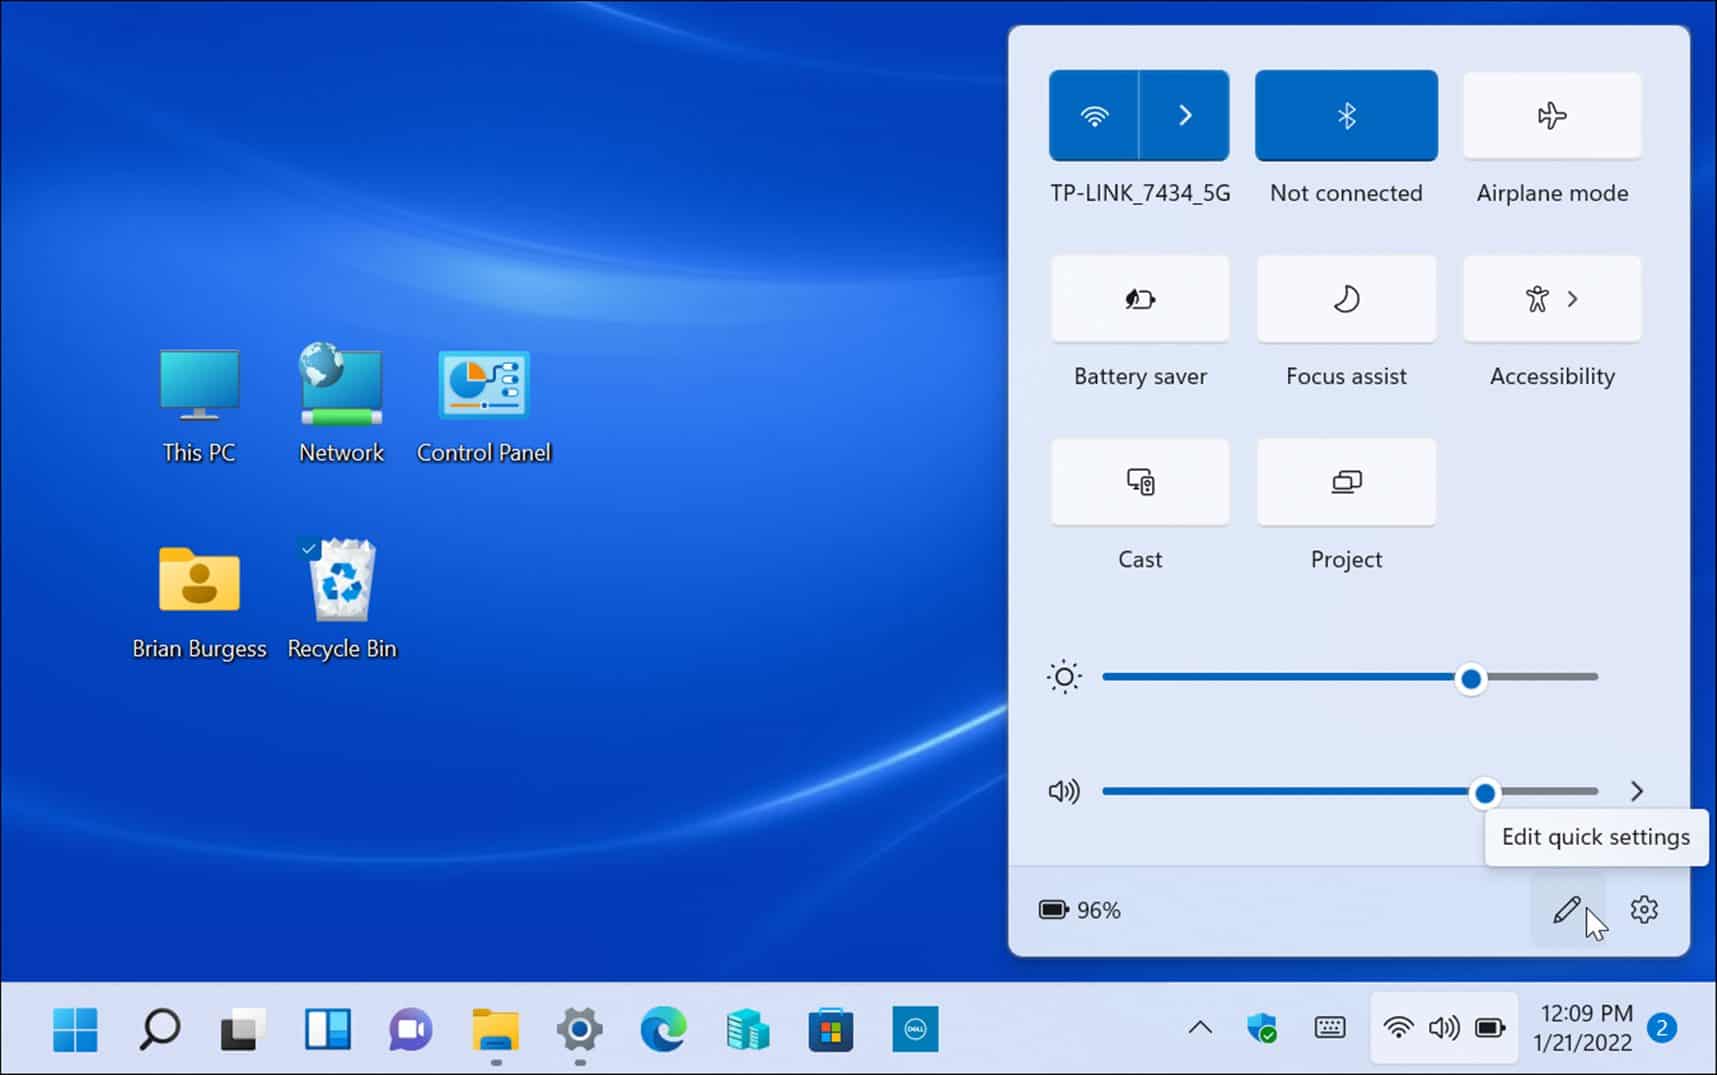
- Next, click the Edit (pencil icon) button, click the Add button, then choose Nearby sharing from the list.

- The Nearby Sharing option will be added to Quick settings—you can then enable or disable the feature with a click.

How to Send Files with Nearby Sharing
Once you’ve enabled Nearby Sharing on your PC, you can start sending files between devices. Transferring files with Nearby Sharing is a straightforward process and easy to do. Remember, it works with both Windows 10 and Windows 11 devices.
To transfer files using Nearby Sharing:
- Open File Explorer by pressing the Folder icon on the taskbar.
- In File Explorer, locate the file you want to share.
- Highlight the file and click the Share button on the command bar.

- Alternately, you can right-click a file and select Share from the context menu.

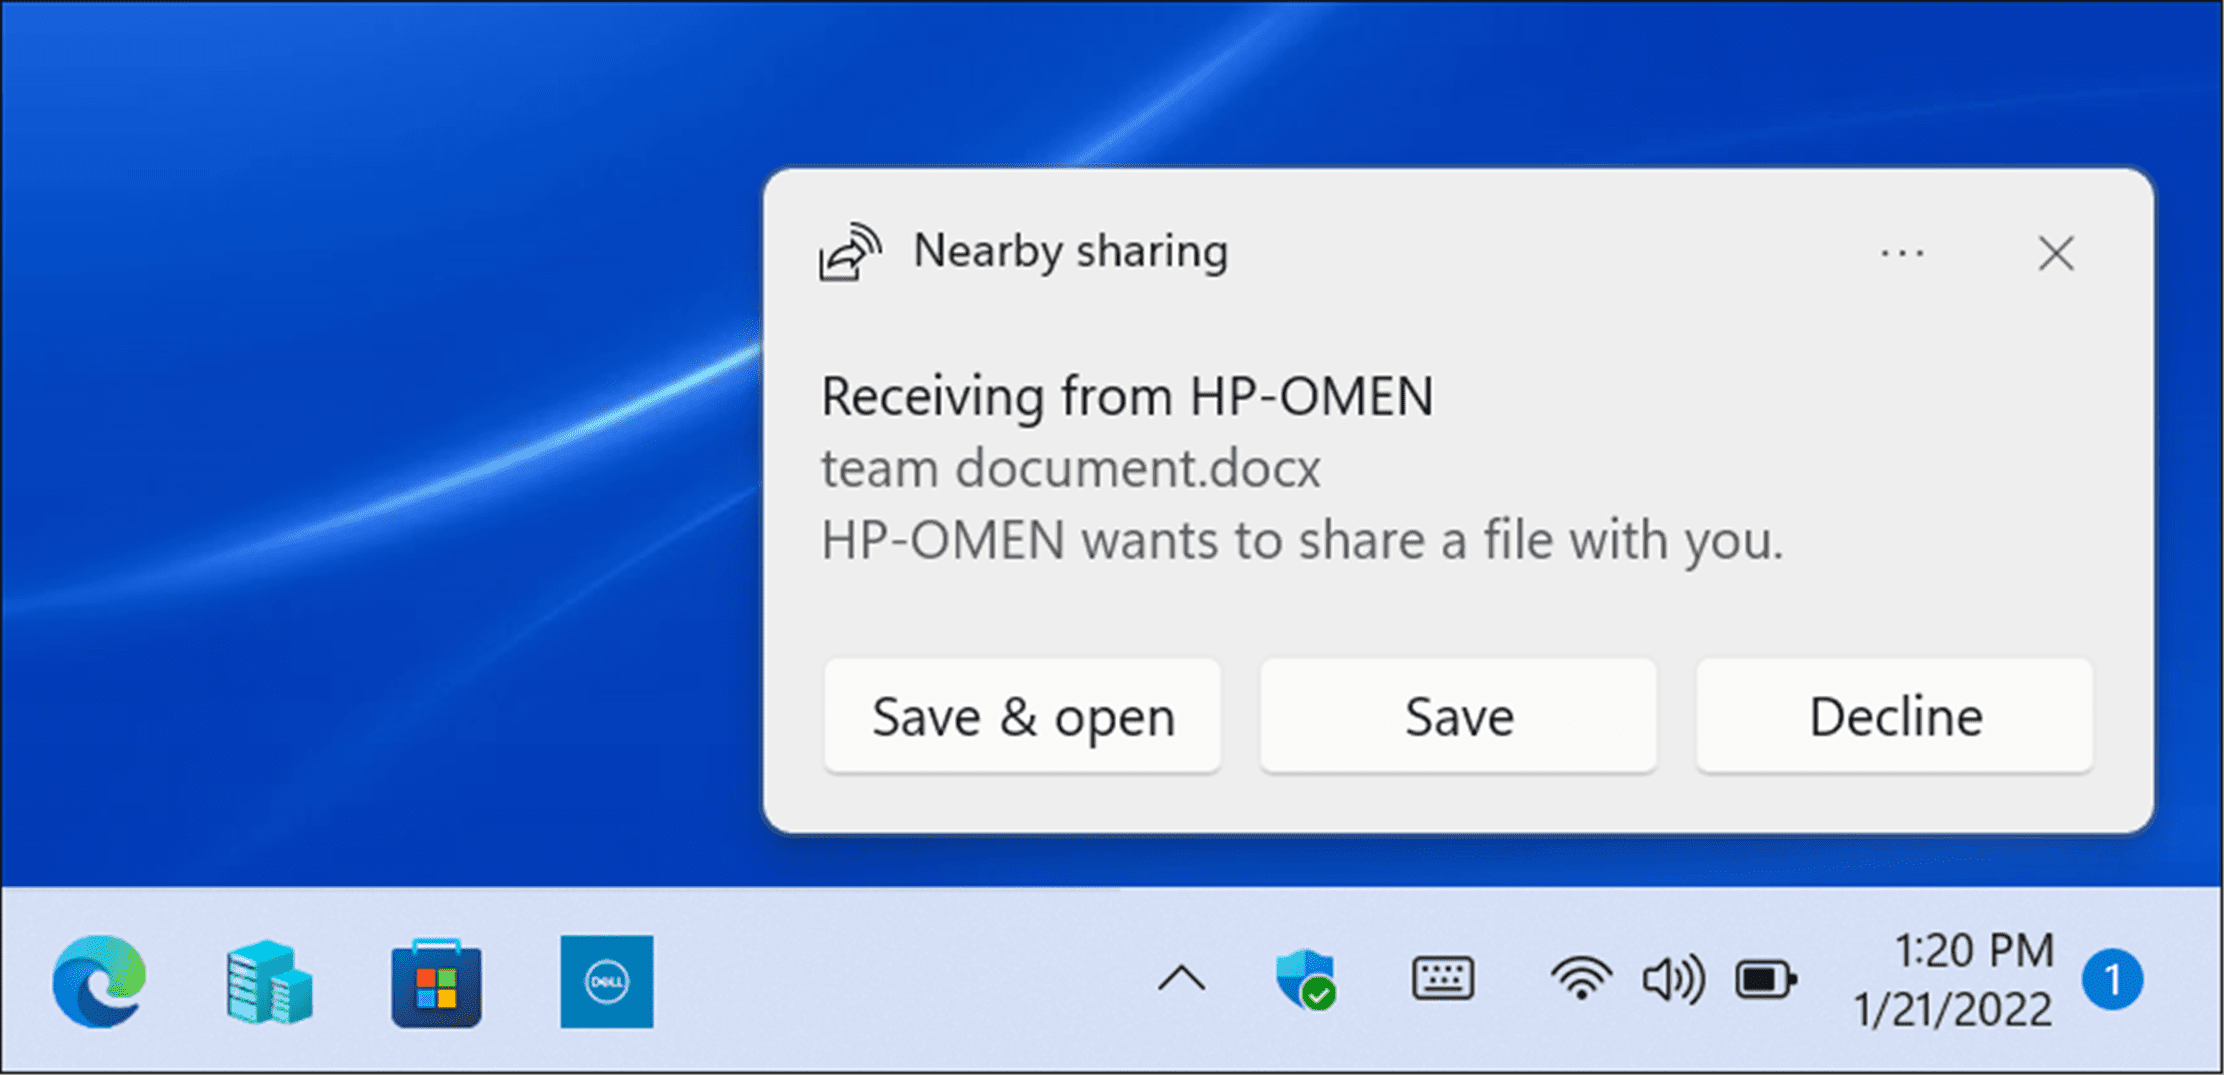
- Select the device to send the file to in the Nearby Sharing pop-up window that appears. Both devices will need to be close by for this to work.

- A notification will appear on the destination device—click the Save & open or Save button. You can also Decline a file if you don’t want it.
How to Change the Nearby Sharing Download Folder
By default, files received using Nearby Sharing will go into your Downloads folder. However, you might want to change the default location.
To change the Nearby Sharing download location:
- Open Start and select Settings or hit Windows key + I to open Setting directly.
- Click System from the column on the left and Nearby sharing from the list on the right.
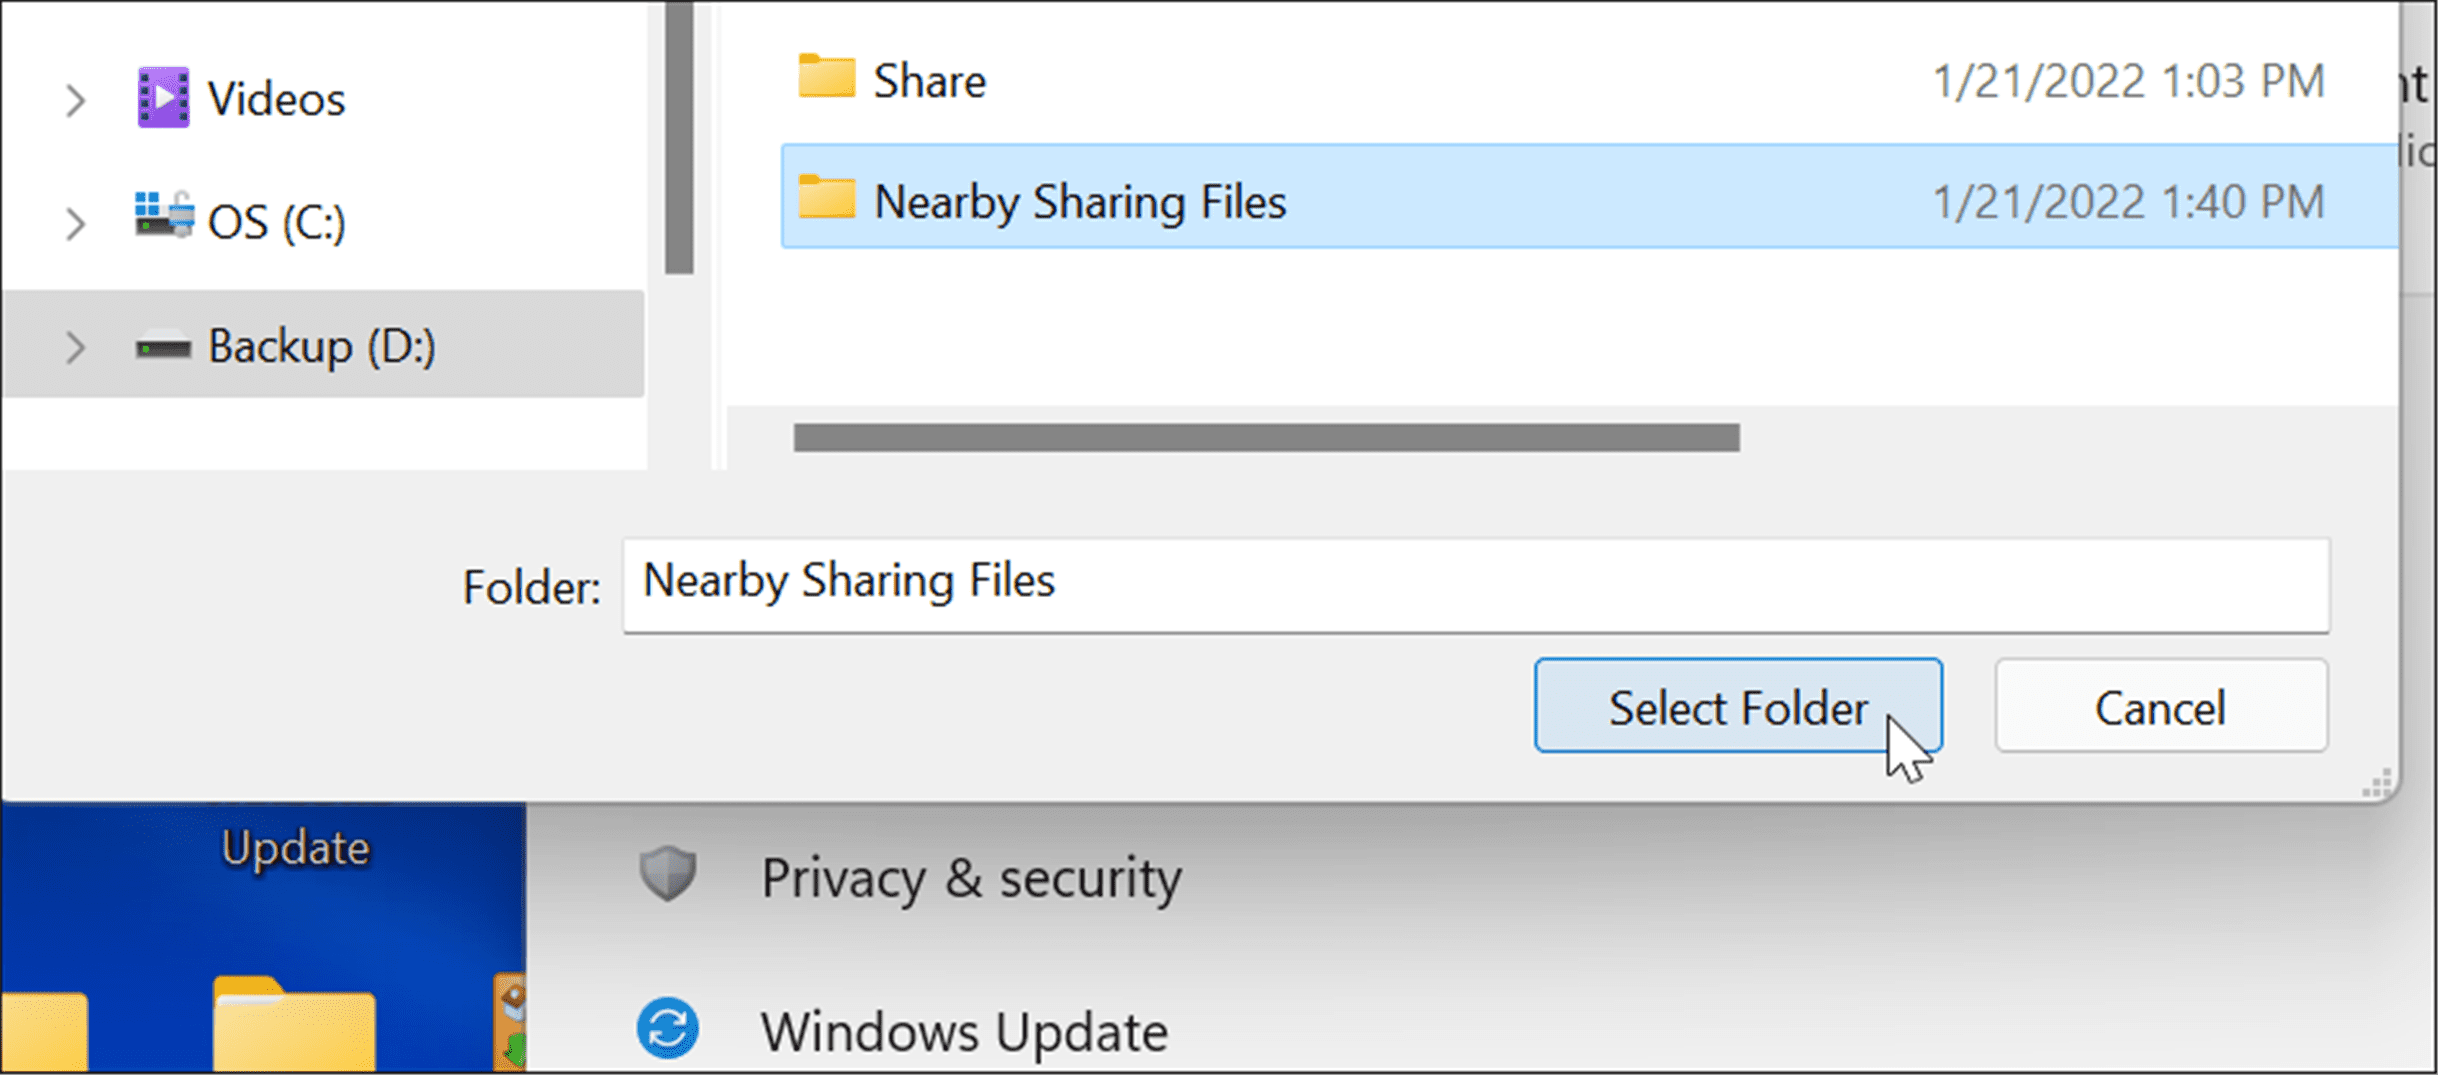
- Click the Change button next to the Save files I receive to option.

- Select a new save location in the pop-up menu, then click the Select Folder button.
How to Share Links from Microsoft Edge Using Nearby Sharing
Nearby Sharing can also be used to quickly share links to webpages in Microsoft Edge between devices. For example, if you want to share a news page with another device on your network, you could use Nearby Sharing to do this.
To send a link to another device using Nearby Sharing:
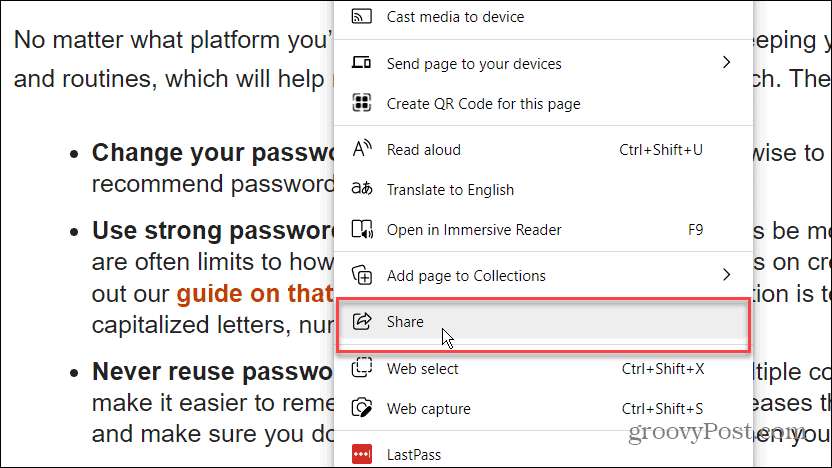
- Open Microsoft Edge and browse to the page you want to share.
- Right-click the web page and select the Share option from the menu.
- Next, click on the Windows share options button.
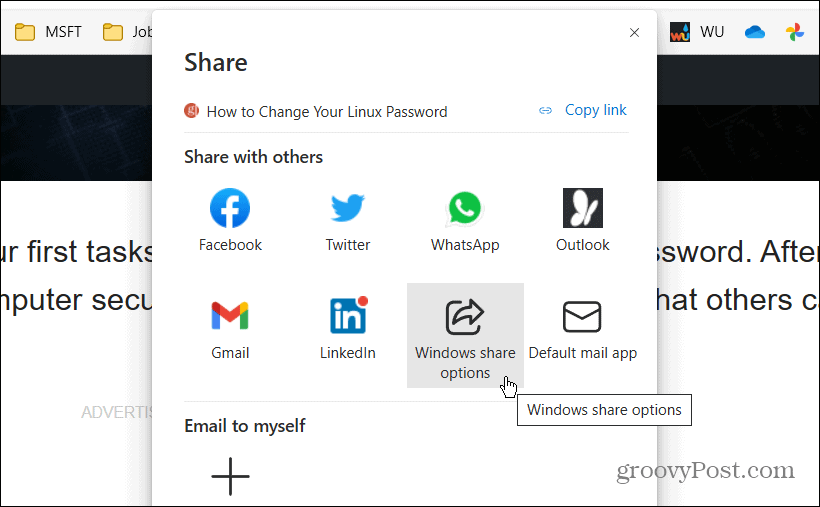
- Under the Nearby sharing section, select a nearby device in the Nearby sharing section.
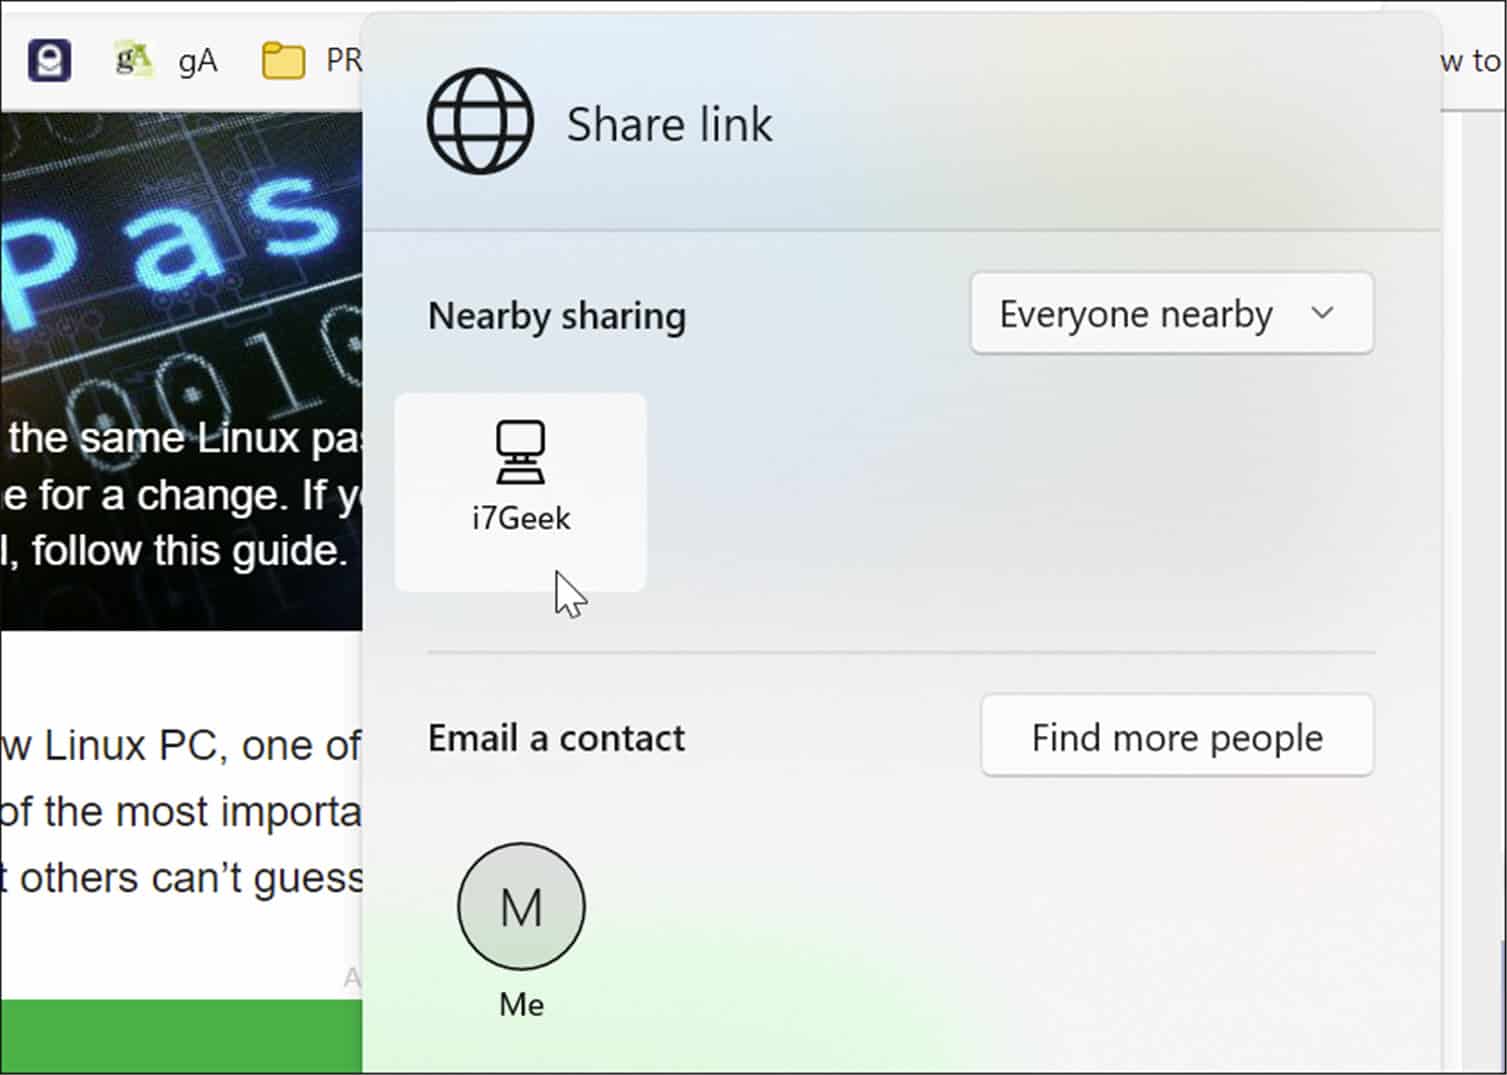
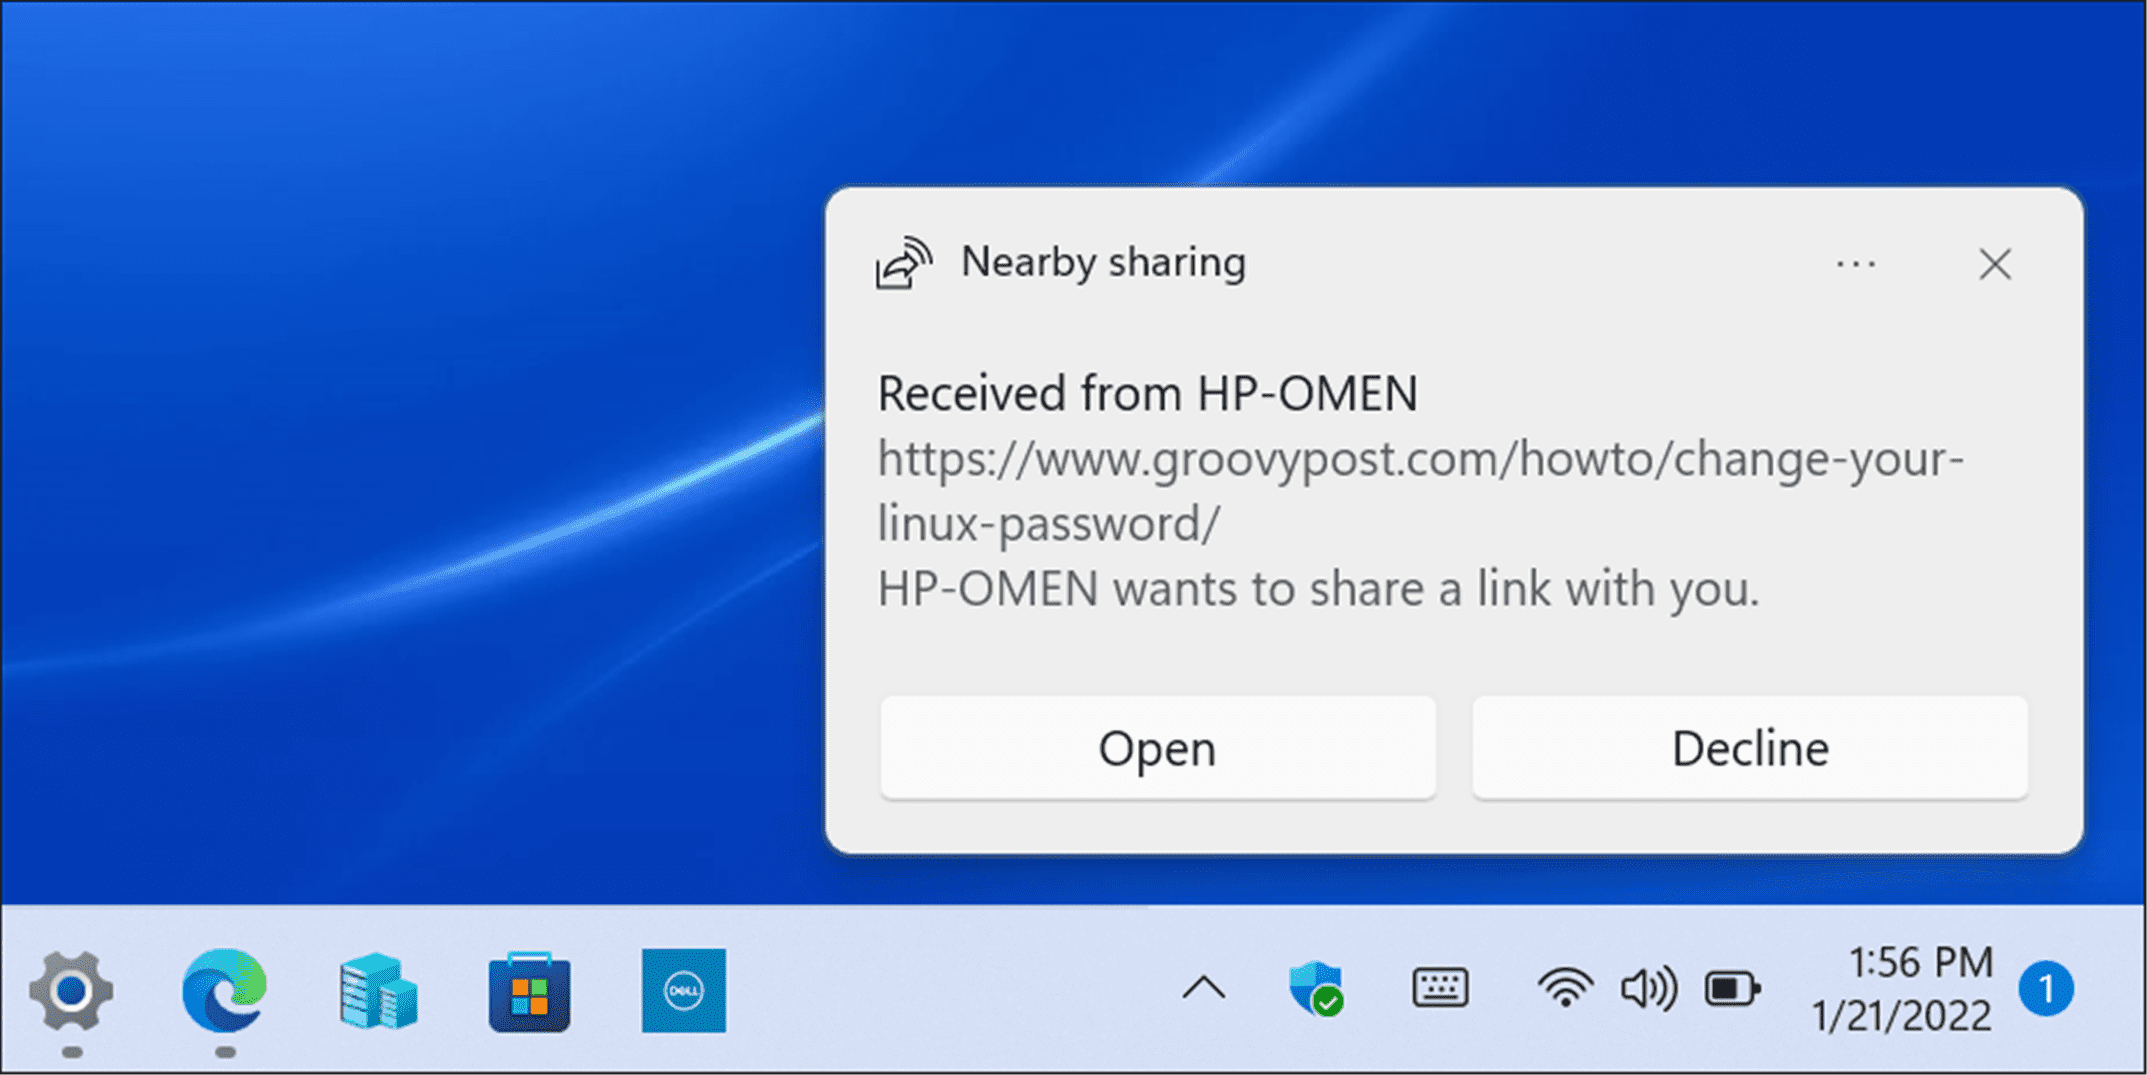
- A notification will display on the receiving PC—click the Open button to view the page or click the Decline button if you don’t want it.
Making Sharing Easier
If you’re regularly moving between different Windows devices on your local network, the Nearby Sharing feature can help you. You can use it to share important files or web links with minimal hassle.
As the name suggests, however, it only works on nearby devices. If you want to share files between different types of devices, or to PCs and servers that are further away, you’ll still need to consider network shares, cloud storage services, email attachments, or an encrypted USB flash drive to transfer your items instead.
If you’re a OneNote user, you might be interested in sharing OneNote notes and notebooks as a quick (and easy) alternative to help you move important web links and messages between your devices.


John Guerin
Hey Brian, thanks for the information, but my nearby sharing isn’t showing up in my system in my updated win 11. Any idea where to turn it on?