How to Delete a Network Adapter in Windows 11

Struggling with network connection issues in Windows 11? You may want to delete a network adapter that you’re not using. This guide explains how.
Do you have a network adapter that you don’t need anymore?
A network adapter is a device that connects your PC to a network, such as WiFi or Ethernet. You may want to delete a network adapter if it’s causing problems with other devices you’re using.
We’ll show you how to delete a network adapter in Windows 11 below.
How to Delete a Network Adapter in Windows 11 Using Device Manager
The easiest way to delete a network adapter is to use Device Manager. Device Manager is a tool that lets you manage all the hardware devices on your PC. You can use it to uninstall any network adapter that you don’t plan on using again.
To delete a network adapter in Windows 11 via Device Manager:
- Right-click the Start menu and select Device Manager from the pop-up context menu.

- Expand the Network adapters section on the Device Manager window by clicking the arrow icon to the left of it.
- Right-click on the network adapter you want to delete and choose Uninstall device from the context menu.

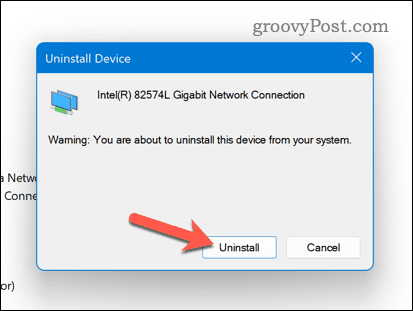
- When the warning appears, click Uninstall.


Repeat steps 4 and 5 for any other network adapters you want to delete. This method will remove the network adapter from your PC, deleting configuration files and drivers.
How to Disable a Network Adapter in Windows 11 Using the Settings App
Another way to stop a network adapter on your Windows 11 pc is to use the Settings app.
Settings is the configuration app for Windows 11 that lets you customize various device settings, including your personalization and privacy settings. You can also use it to disable any network adapter you don’t want to use.
To disable a network adapter in Windows 11 via Settings:
- Open the Start menu and select Settings (or press the Windows key + I on your keyboard).

- In the Settings app, click Network & internet.
- Click Advanced network settings on the right.

- In the available Network adapters list, click Disable for the adapter you want to disable.


This method will turn off the network adapter but won’t uninstall it from your PC. If you decide to use it again, you can repeat these steps and click Enable to restore its functionality.
Managing Your Network Connections on Windows 11
If you’re dealing with networking issues, you can follow the steps above to disable a network adapter on Windows 11 that you aren’t currently using. Should you decide to use it again, you can reinstall the drivers for it or plug it back in again—it should start working automatically. If it doesn’t, you may need to reinstall the drivers for it afterward.
Are you stuck connecting to the wrong WiFi network? You can always forget the network in your WiFi connection settings on Windows 11. If you’re having trouble in certain apps, you may want to check your network NAT type to troubleshoot the problem further.
This might help you to resolve slow internet issues on your Windows 11 PC, for instance.


