How to Turn off Screen Time on Mac and Reasons You Shouldn’t

Apple’s Screen Time is a useful tool. You might want to turn it off or leave it on.
With Apple’s Screen Time, you can monitor how much time you spend each day across your devices, including iPhone, iPad, and Mac. In doing so, you can also schedule downtime and set limits across all of your devices. If you rather not use Screen Time on your Mac, you can easily turn it off following these steps.
Screen Time on Mac
First launched on iPhone and iPad with iOS 12, Screen Time was introduced for Macs with macOS Catalina in 2019 and wasn’t changed with macOS Big Sur a year later. The two versions are very similar, as you’ll see below.
Setting up Screen Time on Mac
To activate Screen Time on your computer:
- Go into System Preferences on your Mac.
- Click Screen Time.
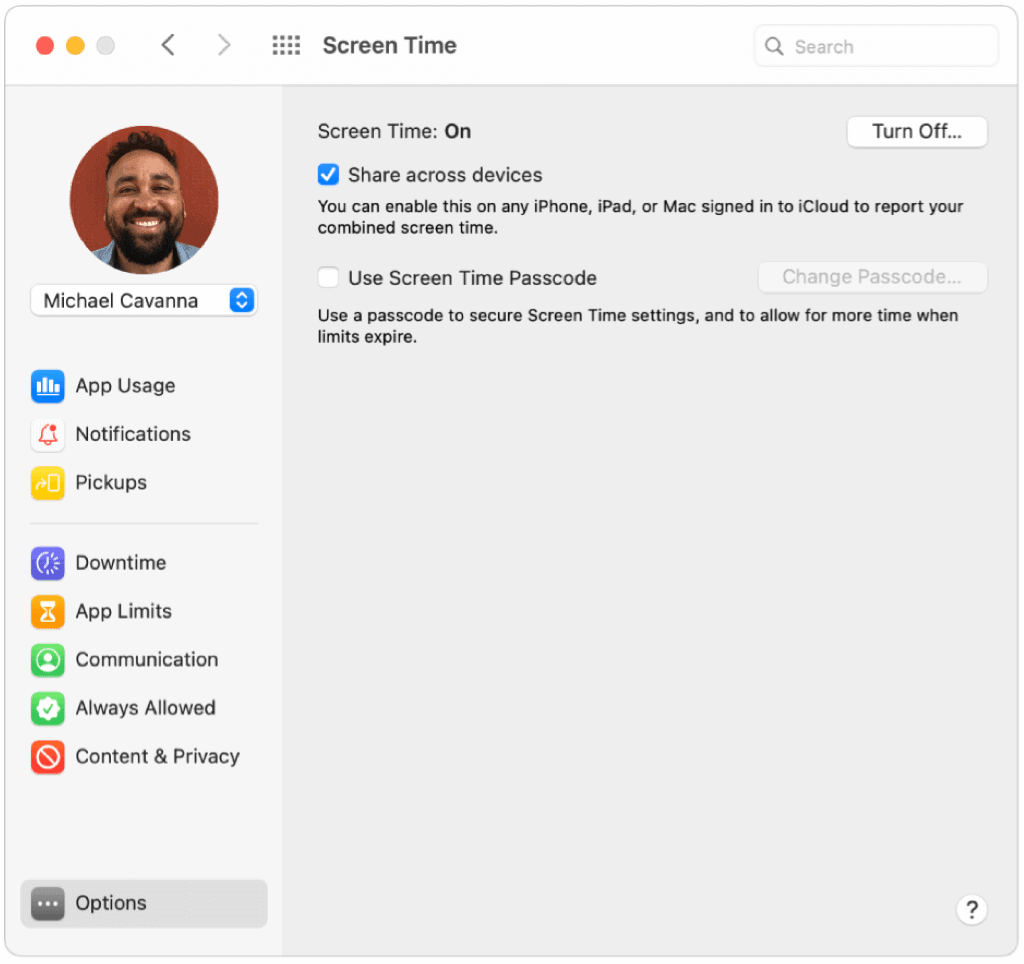
- Choose Options at the bottom left.
- Select Turn On.
To share your information across your other devices, tap Options on the main Screen Time page. Then toggle Share Across Devices.
Screen Time for Kids
With Apple Family Sharing activated, you can manage a child’s account using your mobile device or Mac. The same goes for Screen Time, which you can turn on directly from each of your child’s devices.
To turn this on via your Mac:
- Go into System Preferences on your Mac.
- Click Family Sharing.
- Select Screen Time in the sidebar, then choose your child’s name on the list.
- Choose Open Screen Time Settings button to return to Screen Time preferences.
- Choose your child’s name from the menu in the upper-left corner.
- Click Options in the lower-left corner.
- Select Turn On.
Using Screen Time on Mac
By design, Screen Time offers controls that let you restrict access by time, app, or person. Screen Time also includes tracking tools that show which tasks are being done on each machine.
Restrictions
There are five types of restrictions in Screen Time: Downtime,
- Downtime sets a schedule for when your child can and can’t use their device. By default, it’s set from 10 p.m. to 7 a.m., but you can adjust it to whatever time works best. When Downtime is in effect, there will be a small hourglass icon next to each app’s icon. If they try to launch the app, it can’t be used, and they will see a message that the time limit has been met.
- App Limits let you control the amount of time your kids use certain apps. You can set restrictions on all apps or just apps in certain categories. For example, you might want to set time limits on using social networking apps and games. Once apps are locked, only you can unlock the device to add more time to it.
- With Communication limits, you can restrict Phone, FaceTime Messages, and iCloud contacts by the user, according to the time. For example, during regular screen time, you can allow communication with everyone, contacts, and groups, or contacts only. During downtime, you can allow communication with specific contacts or everyone.
- By setting specific apps to Always Allowed mode, you can make sure they are accessible even when Downtime and App Limits are enabled.
- Finally, under Content & Privacy, you can assign further restrictions. For example, you can also prevent kids from deleting apps, restrict in-app purchases, and set age restrictions on entertainment. You can also limit access to inappropriate web content, games, books and restrict access to certain iTunes Store content. And remember to have a secure passcode that only you know so your kid can’t go in and change any of your settings.
Tracking
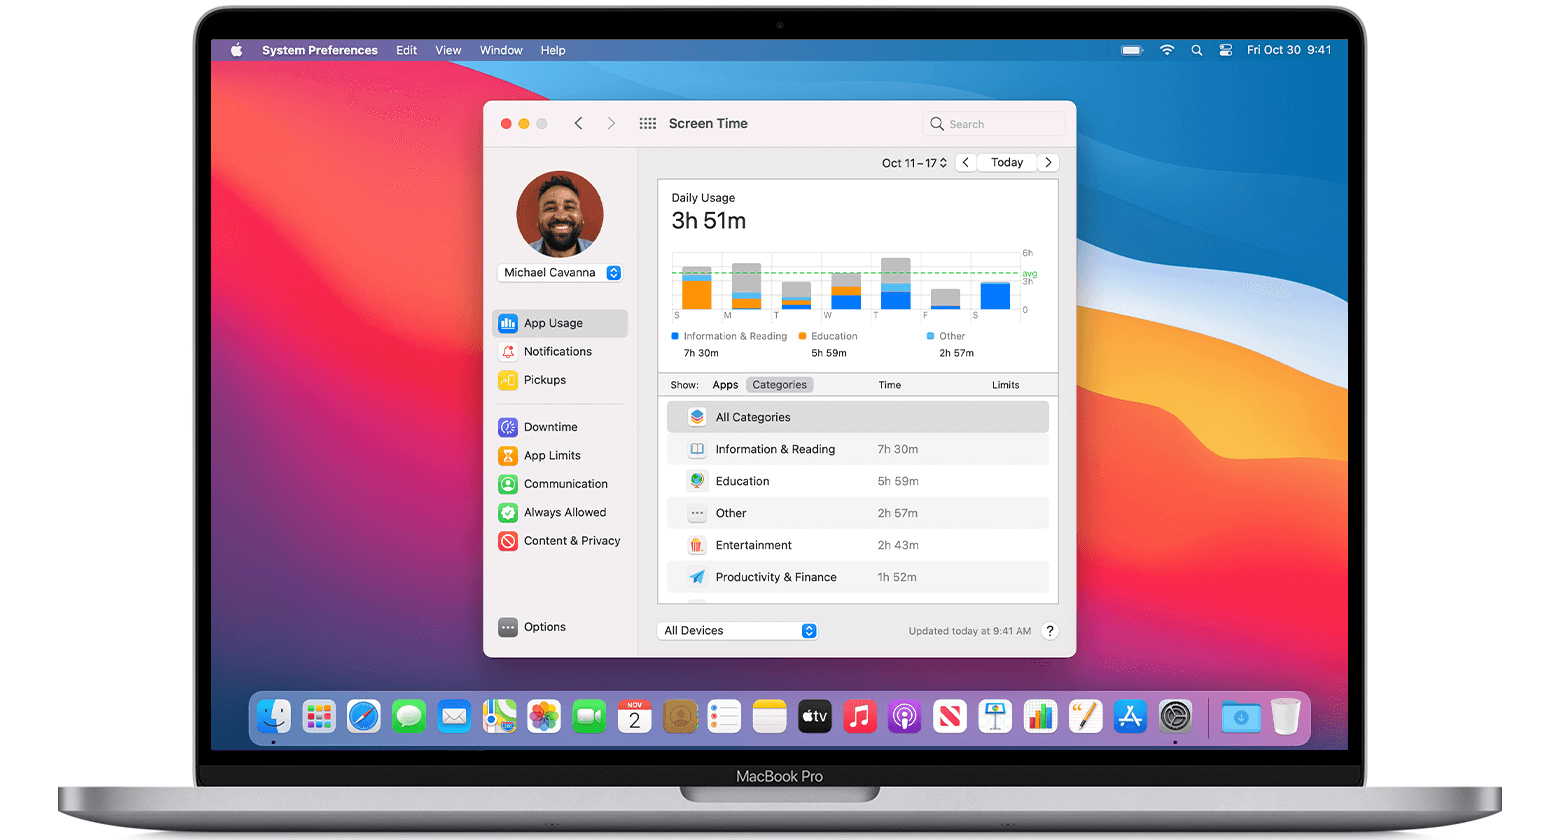
There are three key tracking features in Screen Time on Mac: App Usage, Notifications, and Pick-Ups.
- As its name suggests, App Usage shows you how much time you or your child is spent using each app. You can view this information by categories, such as social networking or entertainment. You can also set an app limit as you can also do on iPhone and iPad.
- Under Notifications, Screen Time shows how many alerts get received for each app. Using the devices menu at the bottom of the Screen Time window, you can separate notifications received by Mac and mobile devices. Notifications are separated according to the app. However, you can’t see the actual notifications in Screen Time.
- With Pick-Ups, Apple also shows you how many times a mobile device gets picked up and which app is checked first. With this information, you can see which apps are most important and when.
Turn Screen Time on Mac
If you don’t want to use Screen Time, you can turn it off with relative ease for yourself, your kids, or both. Turning off Screen Time on Mac does not turn it off on other Apple devices such as iPhone and iPad.
To turn off Screen Time for yourself:
- Go into System Preferences on your Mac.
- Click Screen Time. If you’re using Family Sharing, click the pop-up menu in the sidebar, then choose yourself. Otherwise, you won’t see a pop-up menu on the sidebar.
- Click Options in the lower-left corner of the sidebar.
- Choose Turn Off in the upper-right corner.
To turn off Screen Time for your child:
- When using Family Sharing, log in to your Mac user account and make sure you’re signing in with your Apple ID. Otherwise, log in to the child’s Mac user account.
- Go into System Preferences on your Mac.
- Click Screen Time. If you’re using Family Sharing, click the pop-up menu in the sidebar, then choose the child. Otherwise, you won’t see a pop-up menu on the sidebar.
- Click Options in the lower-left corner of the sidebar.
- Choose Turn Off in the upper-right corner.
- Repeat Steps 1-5 in this section for each child.
Screen Time is a useful tool that you may use across your Apple devices. On Mac, you can turn off Screen Time for yourself or your child at any time — or take advantage of the tool to get a better handle on your computer time. The choice is yours!


