How to Change Scroll Direction in Windows 11

Make scrolling through apps and websites on Windows 11 more natural by changing the scroll direction. This guide explains how.
Are you looking to scroll up or down using your touchpad or mouse when you swipe your fingers? Windows 11 lets you choose between natural and traditional scrolling directions for both devices.
If you want to change your scroll direction in Windows 11, follow the steps below.
Why Should You Change Scroll Direction in Windows 11?
The scroll direction determines how the content on your screen moves when you’re using a touchpad or a mouse wheel. By default, Windows 11 uses traditional scrolling, meaning swiping up on a touchpad or rolling a mouse wheel away from you makes the content move up. This mimics how a physical scroll bar works.
However, some users prefer natural scrolling, which is the opposite. Swiping up on a touchpad or rolling a mouse wheel away from you makes the content move down. This mimics how a touchscreen works, where you drag the content with your finger.
Natural scrolling is more common on Macs and iPhones, so you might find it more intuitive if you’re used to those devices. It can also feel more natural if you use both a touchpad and a touchscreen on your Windows 11 device.
How to Change Touchpad Scroll Direction on Windows 11
You can quickly change the scroll direction for touchpads on a Windows 11 PC. For instance, you may want to do this if you’re using the built-in touchpad on a laptop.
To change your touchpad scroll direction on Windows 11:
- Open the Start menu and click Settings (or press the Windows key + I to open the Settings app).

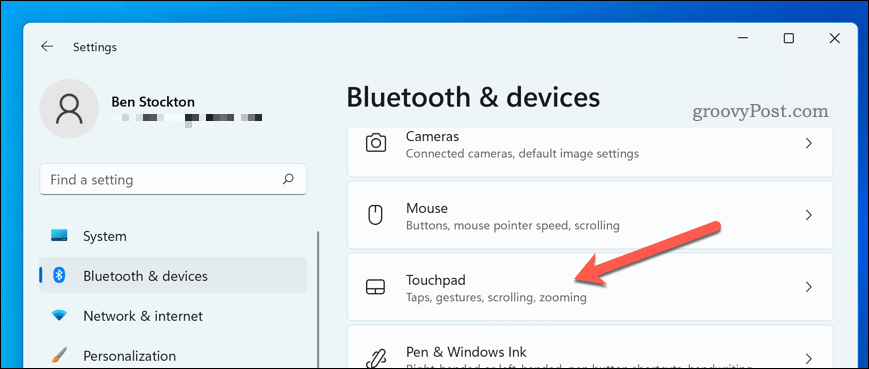
- In Settings, go to Bluetooth & devices > Touchpad.

- Scroll to the Gestures & interaction section and then press Scroll & zoom.
- From the Scrolling direction drop-down menu, select Down motion scrolls down to switch to a natural scrolling functionality.
- Alternatively, select Down motion scrolls up to switch back to traditional scrolling.
- When you’re finished, close the Settings app.

At this point, your new touchpad scroll direction should work. If it doesn’t, restart your PC for the changes to take effect.
How to Change Mouse Scroll Direction on Windows 11
Changing the scroll direction for the mouse isn’t as easy as changing it for a touchpad, as Windows 11 doesn’t have the same options for it in the Settings app. However, there are some workarounds that might work for you, depending on your mouse model and software.
- If your mouse has its own software (such as Logitech Options or Razer Synapse), check if it has an option to reverse the scroll direction. You might need to download and install this software from the manufacturer’s website first, and it’s worth checking your device handbook for more information.
- If your mouse doesn’t have its own software (or lacks the ability to change scroll direction within it), you can try using a third-party tool such as X-Mouse Button Control (XMBC) or WizMouse. These tools let you customize various aspects of your mouse behavior, including reversing the scroll direction.
- You can try editing the Windows registry manually if none of these methods work for you. This is an advanced technique that involves changing some values in a hidden database that stores system settings. Be careful when doing this, as making a mistake could cause problems with your PC. Make sure you back up your registry before you proceed.
Changing Scroll Direction in the Windows Registry
If you want to change the scroll direction of your mouse using the Windows Registry, you can do so—but make sure you back up your Registry first.
To change mouse scroll direction using the Windows Registry on Windows 11:
- Press Windows key + R to open the Run dialog box.
- In Run, type regedit.exe, then press Enter.

- Navigate to the HKEY_LOCAL_MACHINE\SYSTEM\CurrentControlSet\Enum\HID folder.
- Look for folders that start with VID_ followed by four digits (such as VID_046D). These are vendor IDs that identify different devices connected to your PC.
- Expand each folder until you find one that contains a Device Parameters subfolder with a FlipFlopWheel value inside it. This value controls whether your mouse uses natural or traditional scrolling
- Double-click the FlipFlopWheel value and change its data from 0 (traditional) to 1 (natural) or vice versa depending on what you want.

- Repeat this process for any other folders that contain a FlipFlopWheel value in the HID folder.
- When you’re finished, exit the Registry editor and restart your PC for changes take effect.


Managing Your Mouse Settings on Windows 11
Using the steps above, you can quickly change between natural or traditional mouse and touchpad scrolling on your Windows 11 PC. This’ll let you use your mouse the way you want to, but there are other things you can try, too.
For instance, if you’re left handed, you may want to set your mouse to be left-handed on Windows, too. You can also change your mouse sensitivity settings on Windows 11 to suit your requirements. This might help you if drag and drop stops working on your Windows PC.
Want to use your touchpad more? You can customize the Windows 11 touchpad gestures to perform certain actions.


bromberg
Does Windows 10 support this feature?