Ring Doorbell Won’t Stop Ringing: 9 Fixes
A smart doorbell is a great idea until it starts acting dumb. Here are some steps you can try if your Ring doorbell won’t stop ringing.
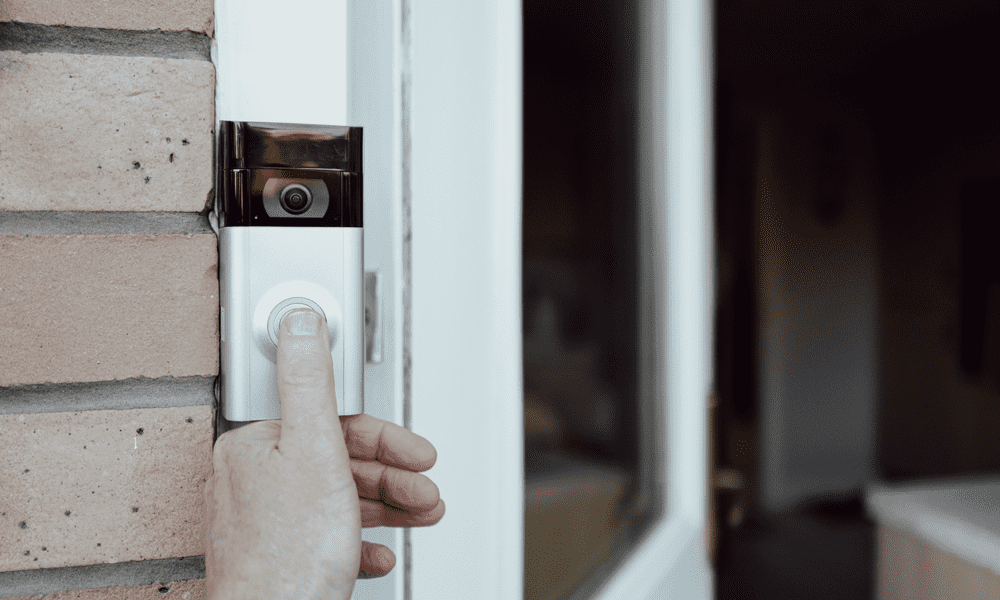
Smart doorbells have become increasingly popular. The ability to see who is at your door and talk to them even when you’re not at home has made doorbells like Amazon’s Ring a common feature in many homes.
Ring doorbells can send alerts to your phone, but you can also use them to trigger a traditional doorbell chime. This is usually a very useful option, especially if you often have your phone silenced, but if something goes wrong, your doorbell ringer can soon become a real nuisance.
Here are some fixes you can try if your Ring doorbell won’t stop ringing.
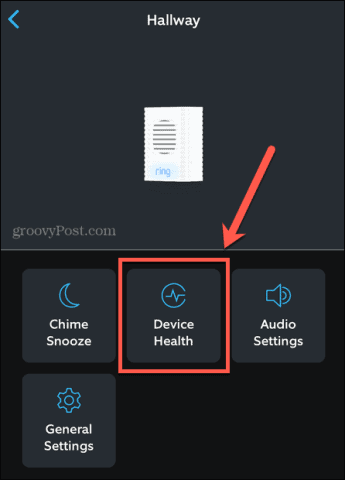
1. Check Your Doorbell Device Health
If your Ring doorbell isn’t connected to Wi-Fi or is connected to the wrong network, it may not work as expected. You may also have issues due to poor signal strength or out-of-date firmware. You can check the current health of your doorbell in the Ring app.
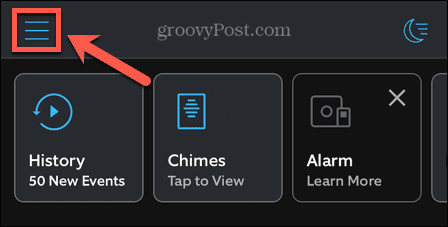
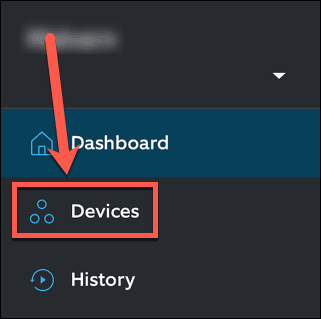
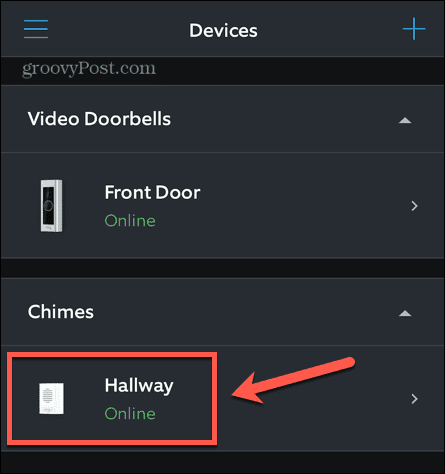
To check the health of your Ring doorbell:
- Open the Ring app.
- Tap the Menu icon.

- Select Devices from the left-hand menu.

- Tap on your chime.

- Select Device Health.

- You can now see information such as the signal strength, Wi-Fi connection, and firmware version.

- If the signal strength is low, you may need to reposition your doorbell. You may also need to change the Wi-Fi network if it’s currently connected to the wrong one.

2. Remove and Replace the Battery
If your Ring device is battery powered and contains a removable battery, removing and replacing your battery may help to fix any doorbell issues. If your Ring doorbell won’t stop ringing, it’s worth trying before taking any more drastic steps.
To remove your Ring battery:
- Undo the security screw at the bottom of your Ring device using the provided screwdriver.
- Slide off the faceplate.
- Push the tab on the battery and slide it out.
- Wait for a minute.
- After a minute passes, replace the battery, faceplate, and security screw.
- Try using your doorbell again to see if the problem persists or whether you’ve fixed the problem.
3. Check the Ring Button
One simple reason why your Ring doorbell keeps ringing is due to the button on your Ring device sticking down. As dirt and grime build up on the button, it can sometimes get lodged in place, causing the bell to ring repeatedly.
Try cleaning off the button with a cloth to remove any excess dirt and grease. Afterward, try out your doorbell again to see if that has solved your problems.
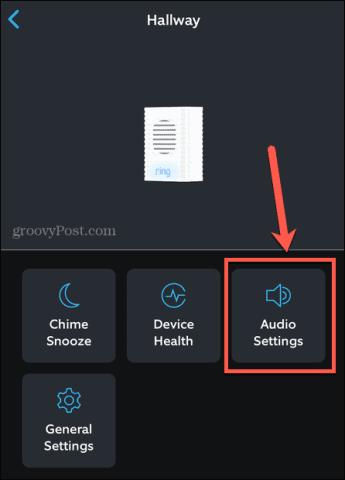
4. Turn Off Motion Alerts
You can set your doorbell chime to only go off when the button is pressed, but you can also set it to go off when your Ring device detects motion. If your doorbell is constantly ringing, it may be that you have motion alerts turned on. You can adjust the sensitivity as explained in the section below, or you can turn off motion alerts for your chime completely. You can still get motion alerts on your phone if you wish.
To turn off motion alerts for your Ring chime:
- Launch the Ring app.
- Tap the Menu icon.
- Tap Devices in the left-hand menu.
- Select your chime.
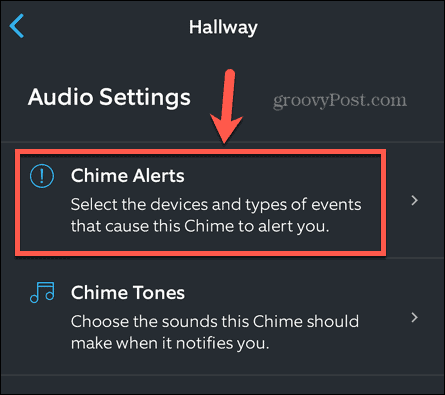
- Tap Audio Settings.
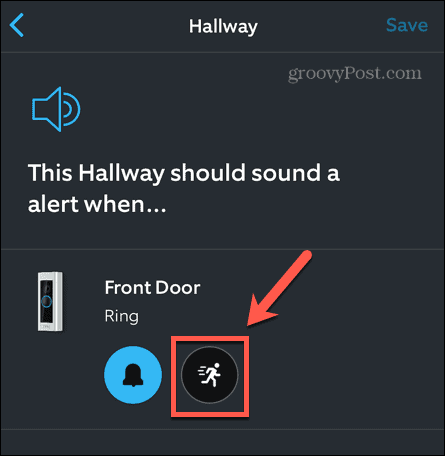
- Select Chime Alerts.

- Ensure that the Motion Detected icon is not selected. If it is, tap on it to turn off motion alerts.

- If you have made any changes, at the top of the screen, tap Save to save your settings.


5. Adjust Sensitivity
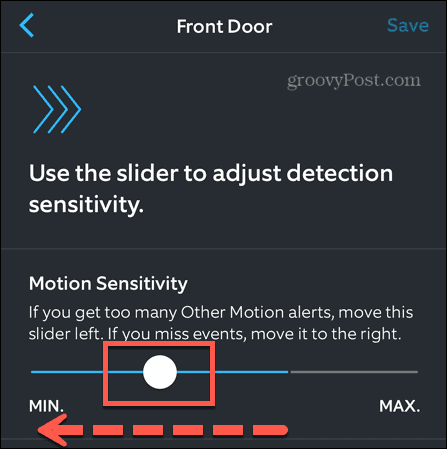
If you would like your doorbell to ring when motion is detected, but it is going off too often, you can reduce the sensitivity. This should reduce the number of times that motion is detected and your doorbell rings.
To adjust the sensitivity of motion alerts on your Ring doorbell:
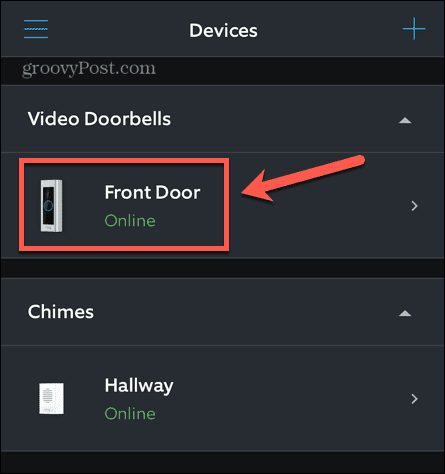
- Open the Ring app.
- Tap the Menu icon.
- Select Devices from the menu.
- Tap on your Ring doorbell.
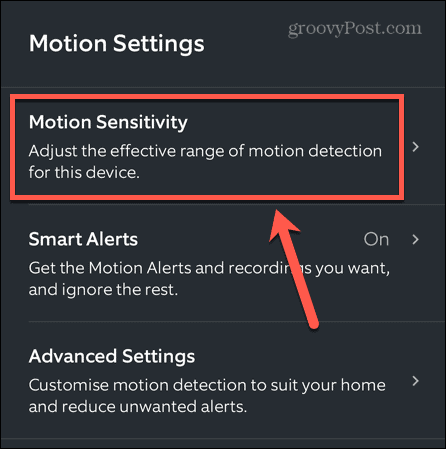
- Select Motion Settings.

- Under Motion Settings tap Motion Sensitivity.

- To reduce motion sensitivity, slide the slider to the left.

- Tap Save at the top of the screen to save your settings.

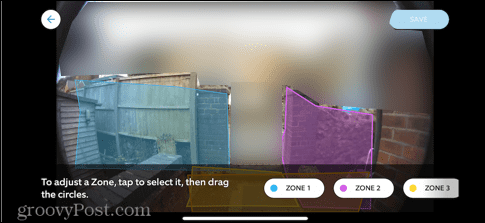
6. Set Motion Zones
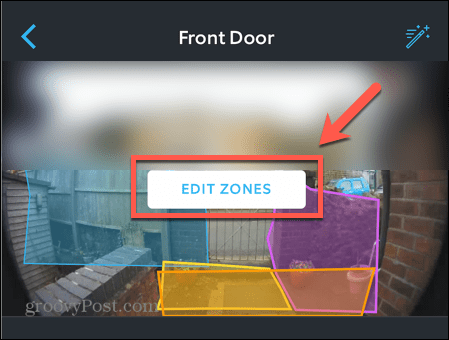
Another way to reduce the number of motion alerts that set off your doorbell is to set up motion zones. These zones ensure that your Ring device only looks for motion in the areas you specify and ignores motion outside of these regions.
To set motion zones for your Ring doorbell:
- Launch the Ring app.
- Tap the Menu icon.
- Tap Devices in the left-hand menu.
- Select your Ring doorbell.
- Tap Motion Settings.
- Tap Edit Zones.

- For each zone, tap to select it, and then drag the handles to reposition and reshape the zone. The aim is to only have Ring monitor the areas where motion means someone is at your door.

- Repeat for each zone you want to include.
- When you’re done, tap Save.
7. Reposition Your Chime
The placement of your chime may also lead to problems. If your chime doesn’t have a strong connection to your Wi-Fi, it may not always work as expected. Interference from other devices may also cause issues.
Try moving your chime to different locations within your home to see if it fixes any issues. You should always keep in mind that you want to position your chime where you are most likely to hear it. It’s no good putting it upstairs in a bedroom if you can’t hear it from your living room.
8. Reset Your Ring Doorbell
If the steps above don’t work, you can reset your Ring doorbell to see if this solves your problems. This is a fairly drastic measure, as you’ll lose all of your settings, including your Wi-Fi networks, motion zones, and sensitivity settings. You’ll need to restore all of these again once the device has been reset.
To reset your Ring doorbell:
- Remove the security screw from your doorbell using the provided tool.
- Remove your Ring device from your door.
- Find the reset button. Depending on your model, this will be on the back, right side, or top-right of your doorbell.
- Hold this button down for about 15 seconds.
- Release the button and the light should start to flash.
- When the light stops flashing, your Ring device has reset. This may take some time.
- Replace your doorbell and reattach the security screw.
- Test out your doorbell to see if the problems still occur.
9. Check Whether Your Ring Doorbell Needs a Diode
If you have your Ring doorbell connected to a traditional doorbell rather than a Ring chime, you may need a diode for this setup to work properly. All devices aside from the Ring Video Doorbell (1st Generation) have the diode built in, but the first-generation device came with a separate diode that could be installed if needed.
If you have a first generation Ring, you can try installing this diode following the manufacturer’s instructions to see if this fixes your problems.
Looking for More Help with Your Ring Doorbell?
If your Ring doorbell won’t stop ringing, then hopefully one of the fixes above will help you to resolve the problem. If you find any other ways to resolve your issues, let us know in the comments below.
As a Ring doorbell owner, you may have other issues that you’d like to resolve. You might want to fix the Ring Live View not working, for example. If you’re having issues with your Ring doorbell not charging, there are some fixes you can try. And if Ring problems mean you want to try a different option, you’ll need to know how to delete a Ring account.


