How to Recover Windows 11 Using a System Image Backup

A full system image backup of your Windows 11 PC allows you to reset and recover it if there’s a problem. To recover your PC this way, follow these steps.
If you have a Windows 11 system image backup, you’re protected from data loss and PC failure, as it allows you to recover your PC if things go wrong.
It could be a devastating malware attack, unforeseen hardware failures, or just general system instability—a system image lets you restore your PC to before there was a problem (assuming your hardware is working).
If you’re unsure how to recover Windows 11 using a system image backup you’ve previously created, you can do so quickly by following these steps.
How to Restore Windows 11 Using a System Image Backup
Before you begin to restore Windows 11 from your system image, you’ll need to create a bootable Windows 11 USB installation drive or have a Windows 11 USB recovery drive ready to go.
Booting into System Recovery
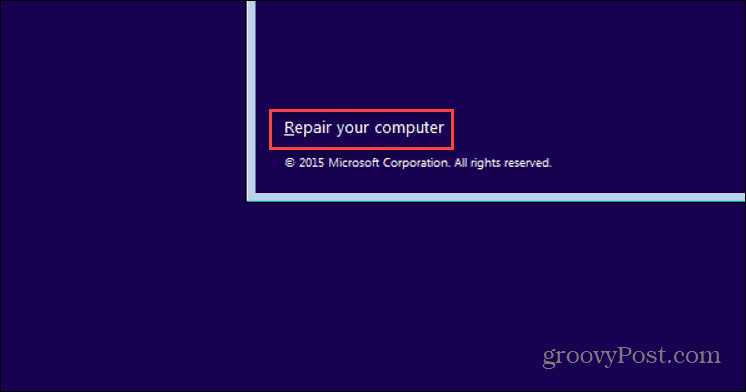
If you’re using a Windows 11 installation drive, wait until you see the Windows Setup screen. Once you reach the Windows Setup screen, click Repair your computer in the lower-left corner.
If you’re using a Windows 11 USB recovery drive, skip this step—you’ll boot straight into the next menu.
Note: If your PC doesn’t boot into this screen, you’ll need to access the BIOS/UEFI menu and change the boot order. Getting to the BIOS/UEFI menu varies between machines. If you’re not sure how to do this, check the manufacturer’s support documentation.
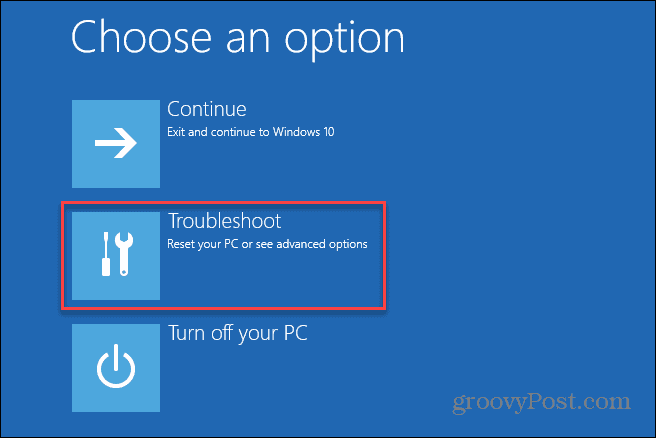
You should see the Advanced Options menu next—click Troubleshoot.
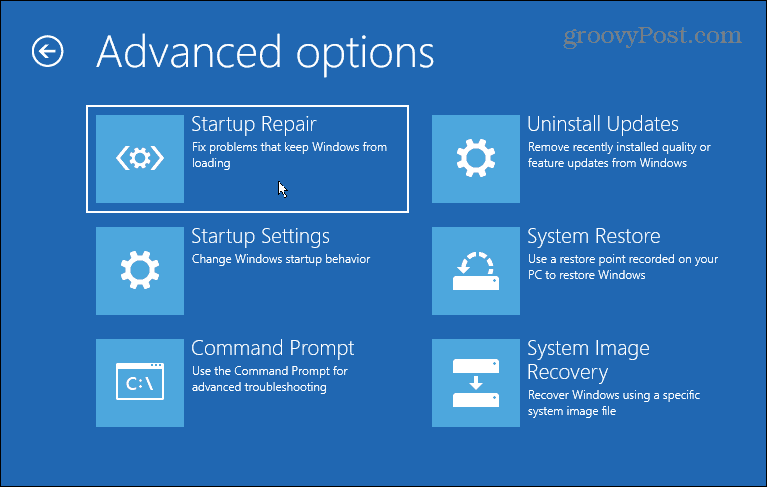
In the Advanced options menu, press the System Image Recovery option.
If you have BitLocker enabled, you’ll need to type in your security key. You can find the key by signing into your Microsoft account. For more on that, check out this Microsoft Support page.
Restoring Windows using a System Image Backup
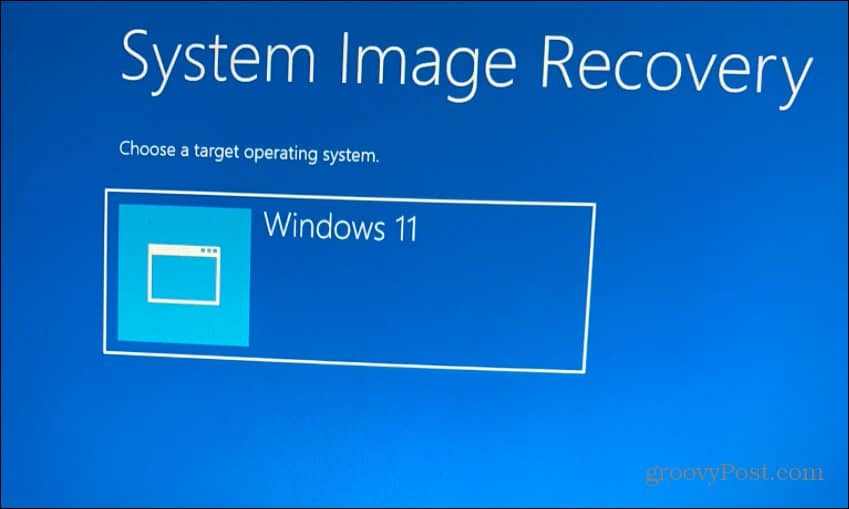
You should now be able to begin the process to restore Windows 11 using your system image backup. To do this, select the Windows 11 option under the Choose a target operating system section.
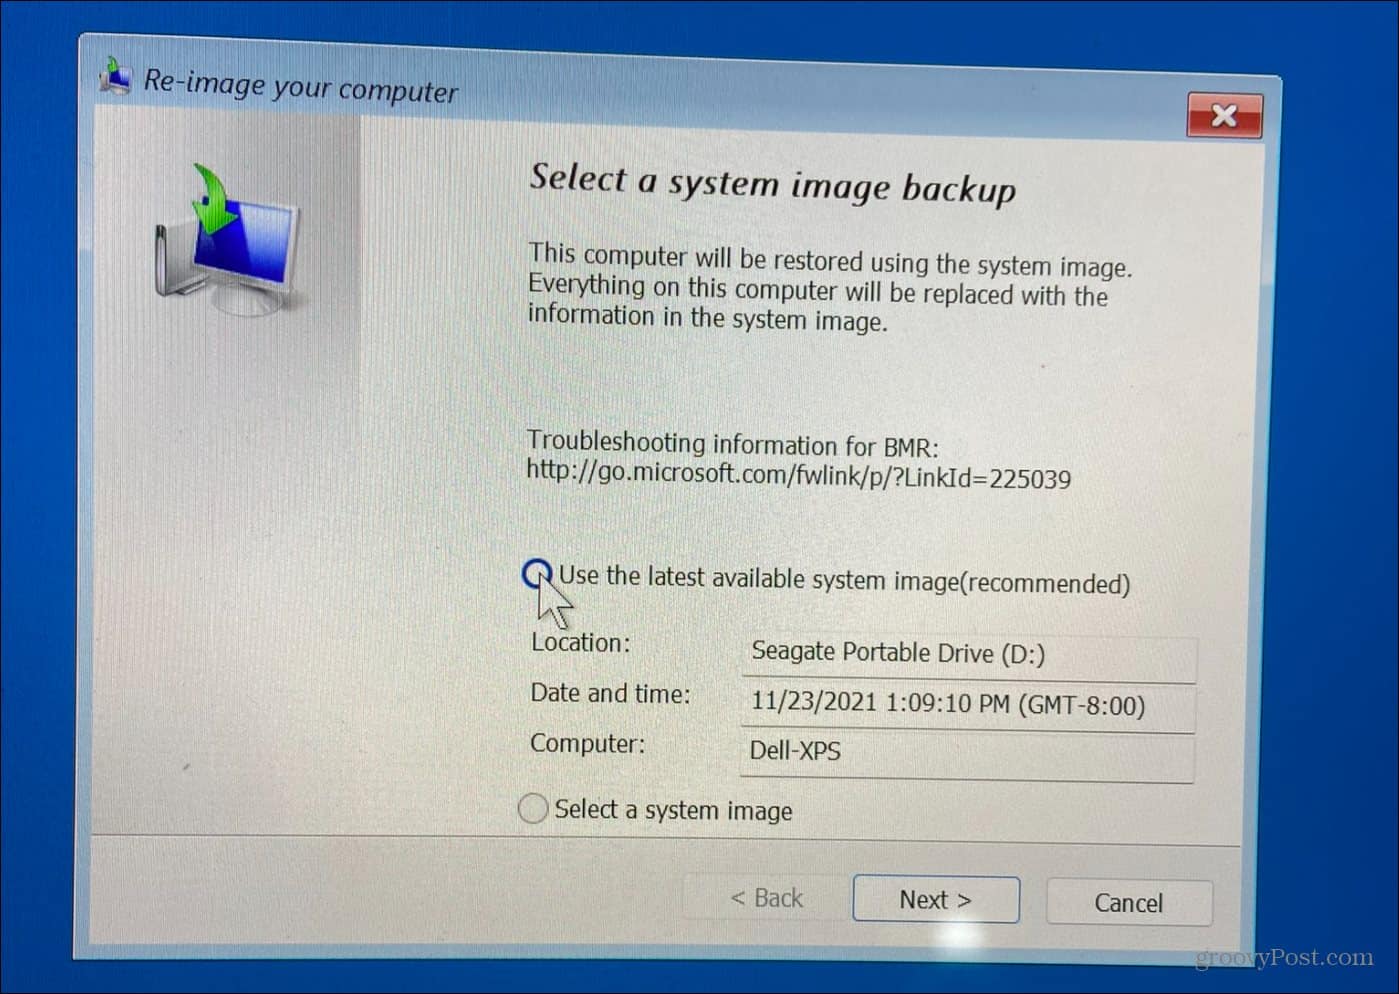
In the Re-image your computer menu, select the Use the latest available system image option and click Next.
If you’d prefer to use an older system image, choose the Select a system image option instead.
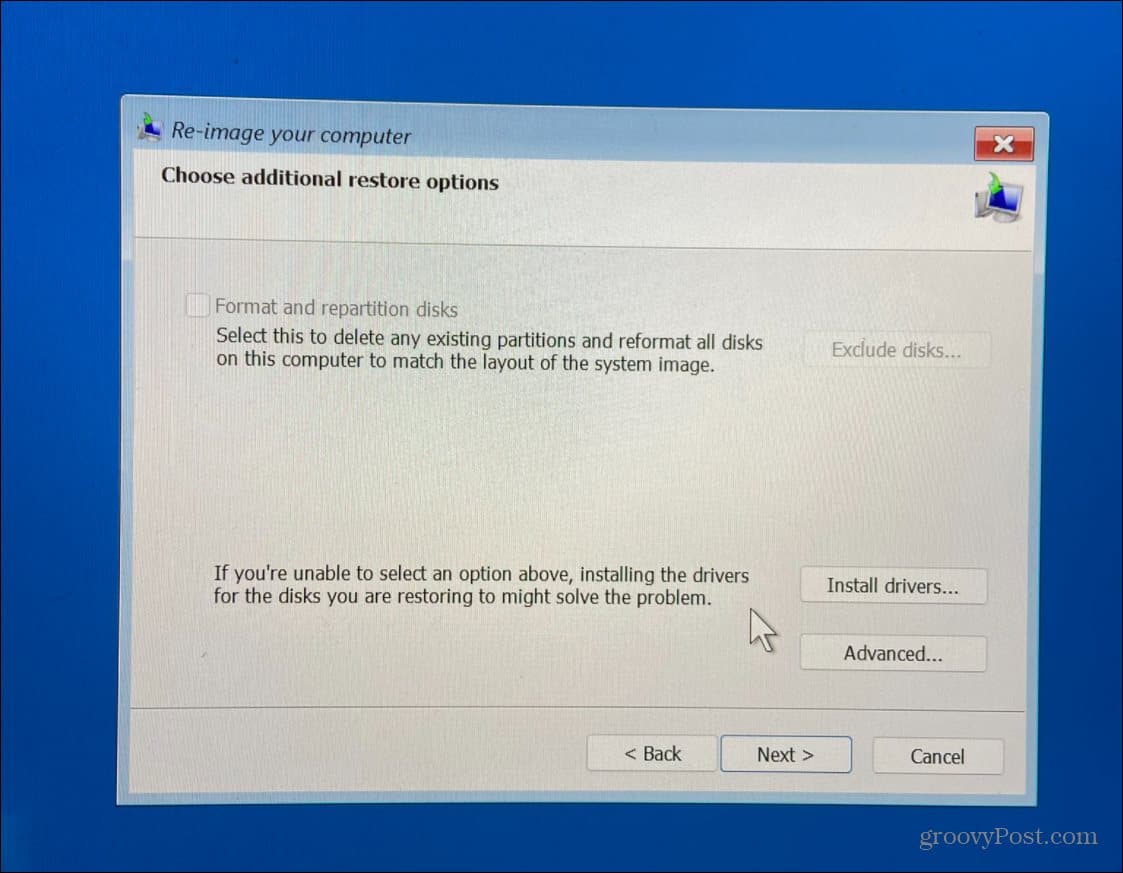
On the following screen, you can select the Format and repartition disks option before continuing. This is an optional step, and you’ll want to exclude any secondary drives to prevent data loss.
Typically, you’ll only use this optional step on new drives. It’s also optional to check the Only restore system drivers option.
After you’ve worked through the wizard and are comfortable with your selections, click the Finish button.

You’ll be warned about data loss—click Yes to confirm and proceed.

After that, the recovery process will start. The time it takes will vary based on the amount of data and the system’s resources.
After Recovering Windows 11 from a System Image Backup
The steps above should help you to recover Windows 11 using a system image backup. Your PC will reboot a few times during the process, so allow plenty of time for this to complete. When this is done, you’ll want to install any recent updates that the backup doesn’t include.
To do this, press Start, then press Settings > Windows Update to manually check for updates.
Remember that this process is meant to recover your entire system—not just individual files. For example, to back up and restore files, use OneDrive file sync or use the File History feature instead.
You can also create a restore point in Windows 11, which you can use as a faster alternative to restore an older version of your Windows installation. If you’re selling or gifting your Windows 11 PC, or you just want a clean start after a problematic update, you may want to consider resetting Windows 11 to factory settings.


