How to Limit App CPU Usage on Windows 11

If your PC is sluggish, it could be an issue with high CPU usage. Learn how to limit app CPU usage on Windows 11 for best performance in this guide.
If your computer is running sluggishly, displaying BSOD errors, or overheating, you can check and limit apps using too many CPU cycles. Limiting app CPU usage on Windows 11 can help prevent problems with an overworked processor.
You might not be able to narrow down the exact app setting that causes high CPU usage, but there are things you can do to identify the problematic app and put a limit on it.
In this guide, we’ll show you steps to take to relieve the stress put on your processor by changing the app and power settings.
Limiting App CPU Usage on Windows 11
When your PC is running slower than it should, there are different things you can do to make it faster. For example, you can make Windows 11 boot faster or change system settings to allow it to run faster on old hardware.
Regarding app usage, you can disable background apps to improve system performance. You can also limit the amount of CPU usage by apps through system settings. In addition to helping the PC run faster, some options can prevent overheating problems.
Note: If you aren’t on Windows 11 yet, no worries; these options also work for Windows 10 apps.
Find High CPU Usage Apps
One of the first steps is finding apps with high CPU usage. If you need to regain system performance quickly, you can end the process directly from the task manager.
To identify apps with high CPU usage:
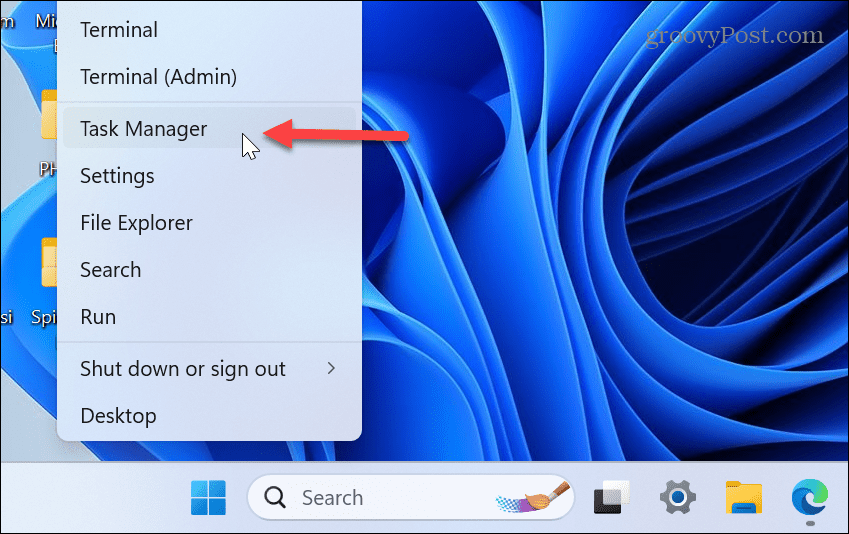
- Right-click the Start button and select Task Manger from the menu.

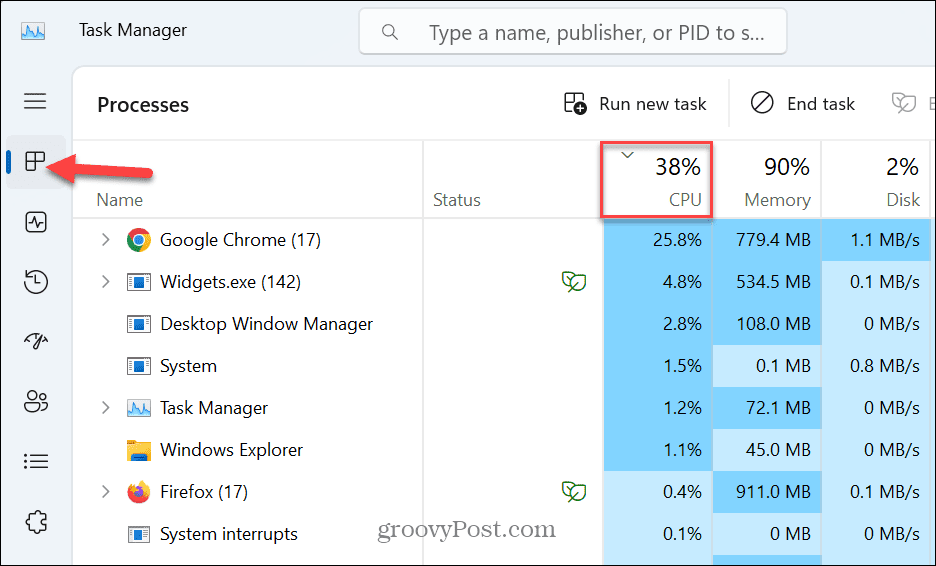
- Select the Processes tab on the left and click the CPU column header to sort apps by usage.

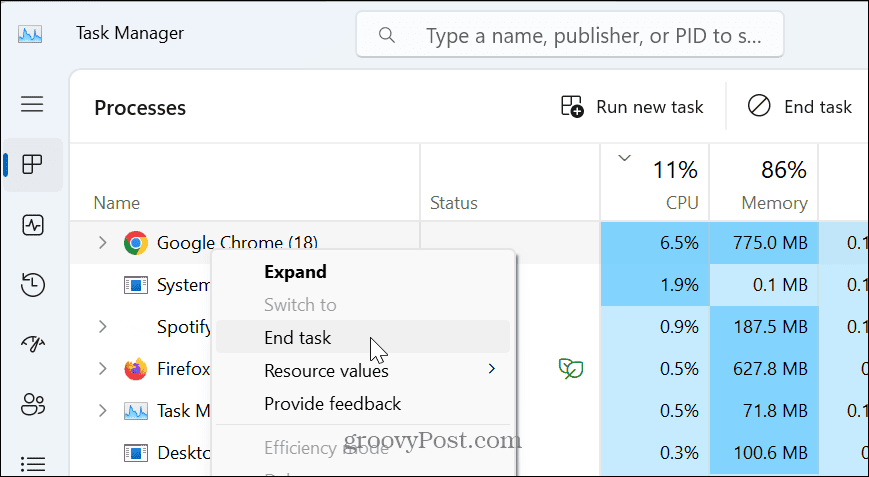
- You may discover an app that’s using an obnoxious amount of CPU and slows your PC down. So, right-click the app and select End task.

Change App Process Priority
If you don’t want to end a process, you can limit an app’s CPU usage by changing its process priority. This can be done quickly using the task manager.
To change an app’s process priority:
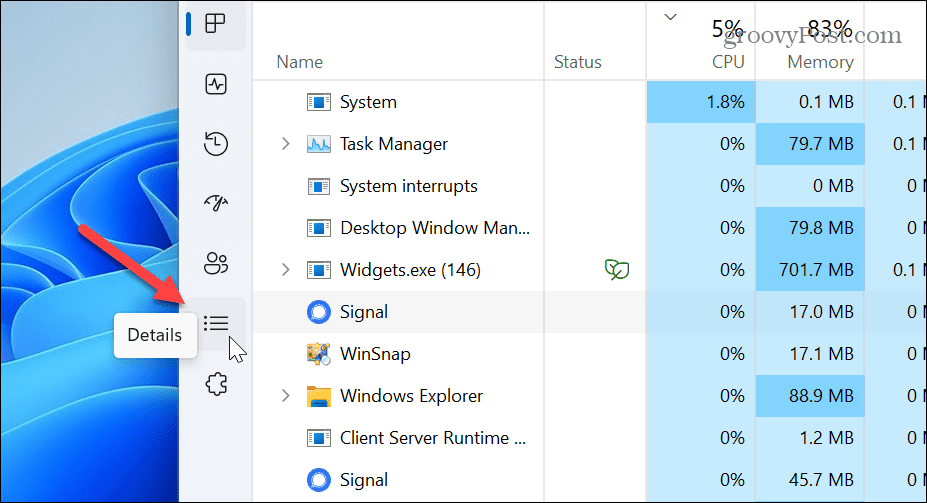
- Open Task Manager.
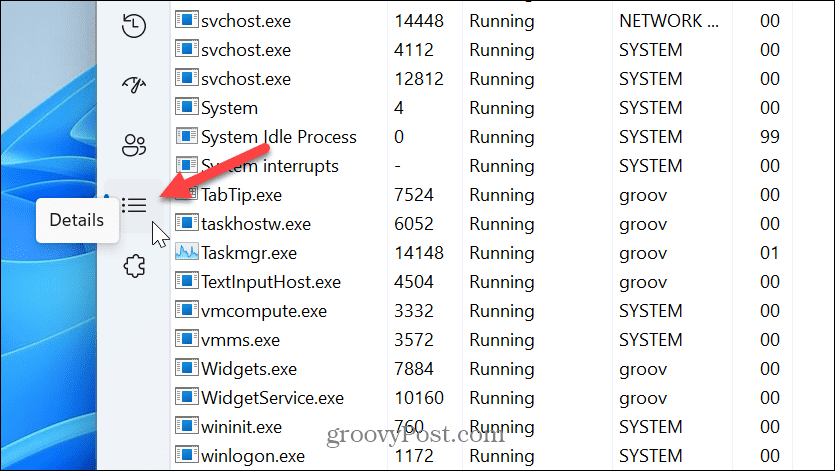
- Select the Details tab on the left.

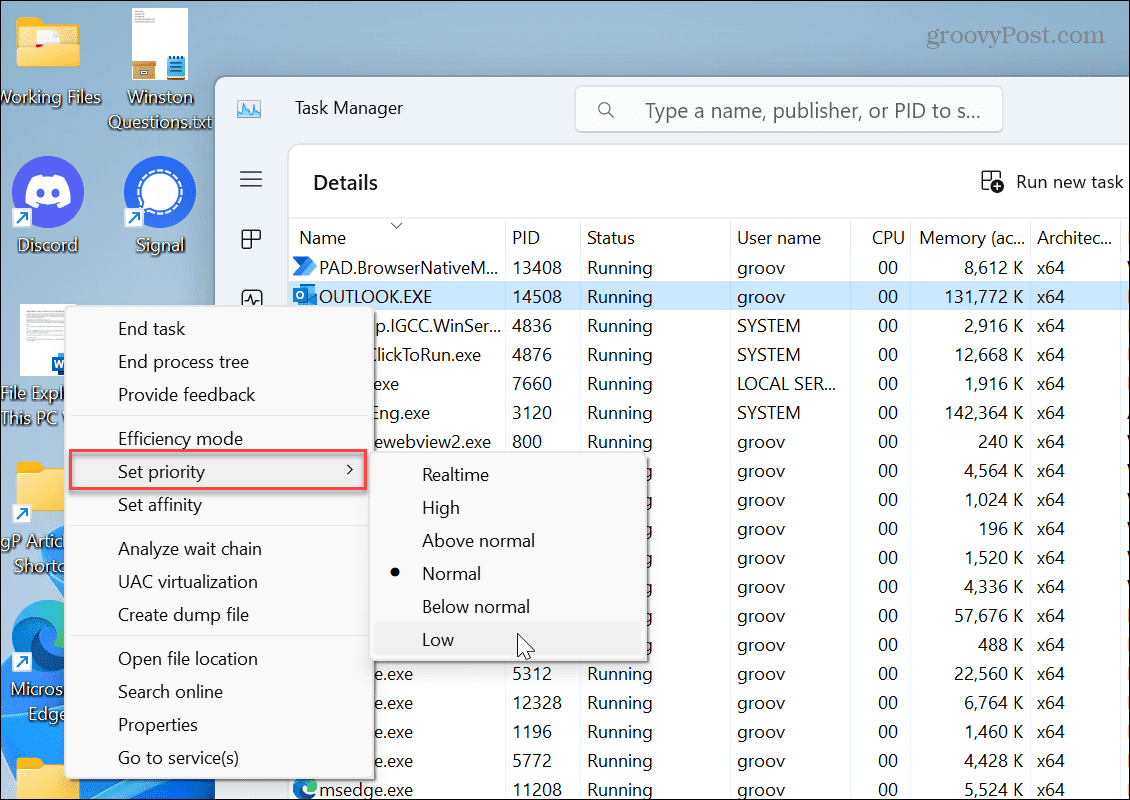
- Right-click the app you want to slow down, select Set priority, and set it to the Below normal or Low option from the menu.

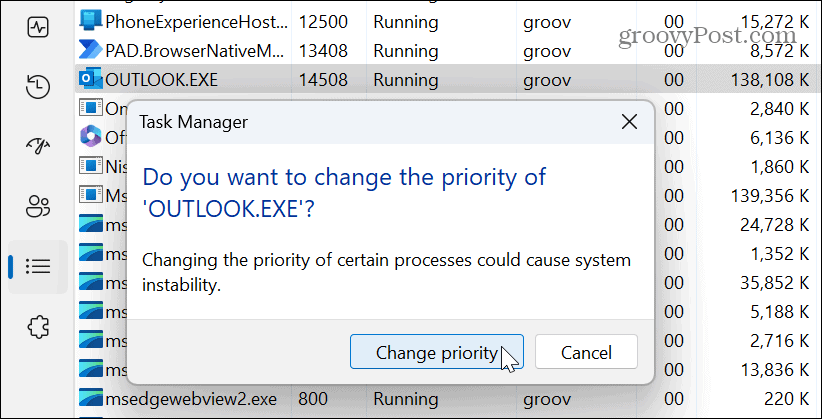
- Click the Change priority button when the verification message appears.

If the app you set to a lower priority runs too slow in a future session, you can always reset it to Above normal, which is the default. Also, you can’t change the priority for fundamental system processes.
Change Processor Power State
It’s also worth mentioning that if you are having an issue with your CPU becoming too strained or overheating, you can adjust its maximum power state. Doing so will put less stress on the CPU and prevent overheating. This is also beneficial if you are monitoring CPU temperature.
To set processor power state:
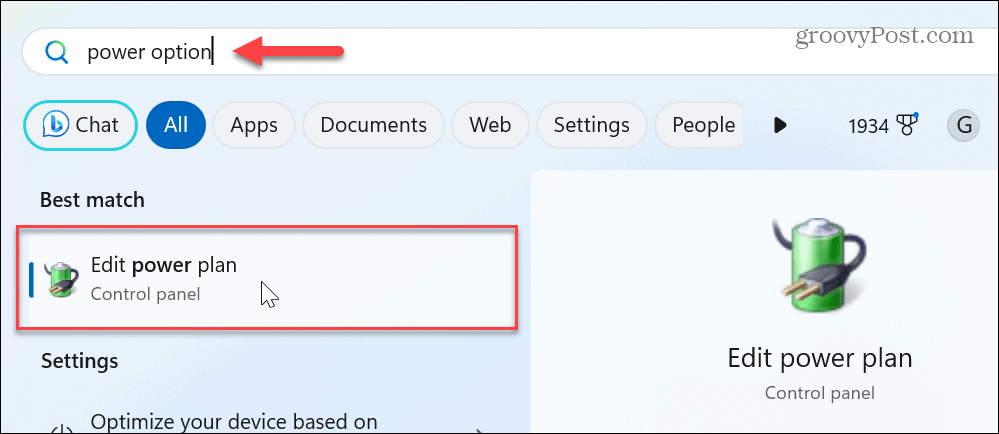
- Press the Windows key, type power options, and select the Edit power plan option.

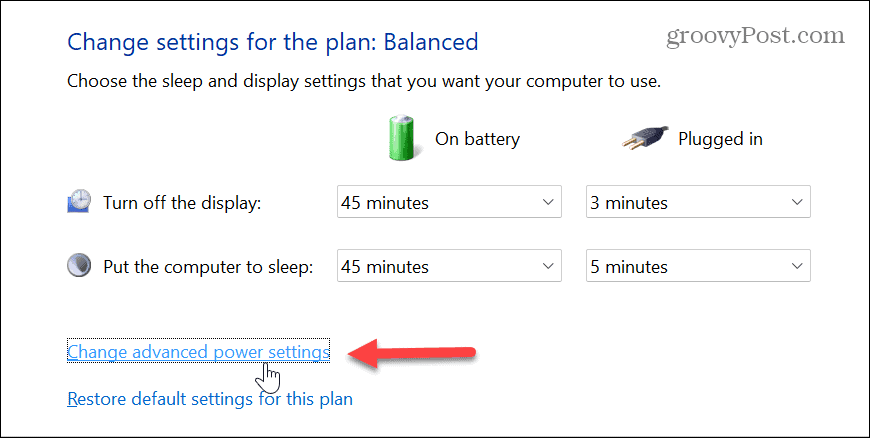
- Click the Change advanced power settings link.

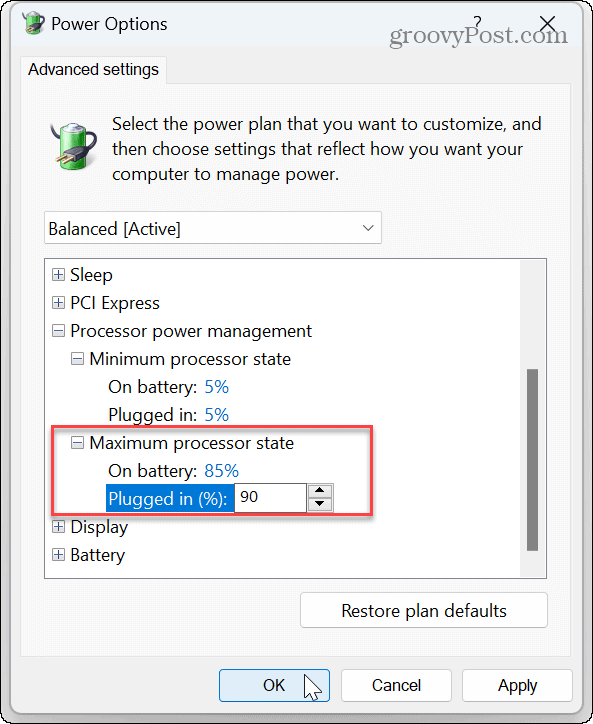
- Expand the Processor power management menu.
- The default settings should be 100 percent. Change the values to something between 80-90 percent for Battery and Plugged in.

- Click Apply and OK to save the changes.
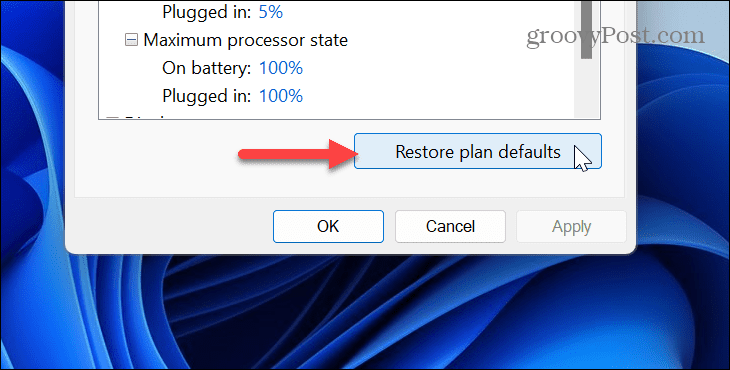
Note that this will override power settings you may have changed, like Energy Recommendations, for example. You can always go back into power options and change the values back if you find the PC isn’t running correctly. An easy way to restore power settings is by clicking the Restore plan defaults button at the bottom of the Power Options window.
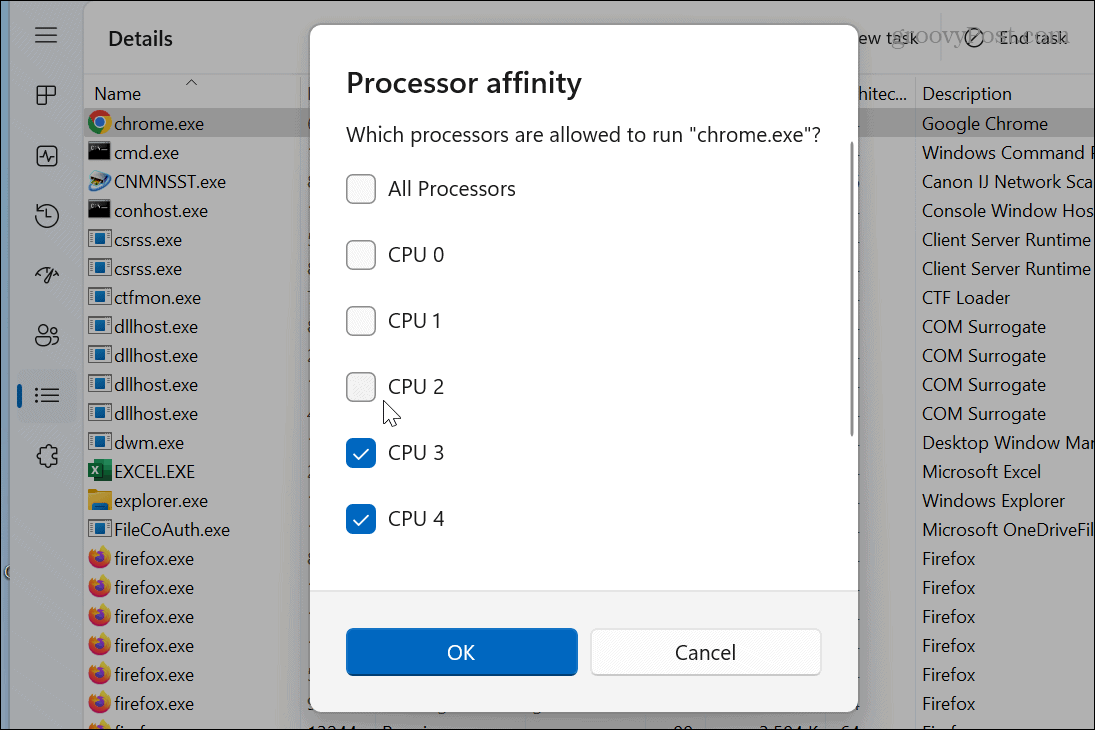
Modify Processor Affinity
Modern CPUs include multiple cores; your apps run on the cores Windows assigns. The selection of cores that apps work with is called processor affinity. However, if an app is problematic, you can manually change the affinity so it uses fewer cores.
To set processor affinity on Windows 11:
- Right-click an empty area on the taskbar and select Task Manager.

- Select the Details tab on the left.

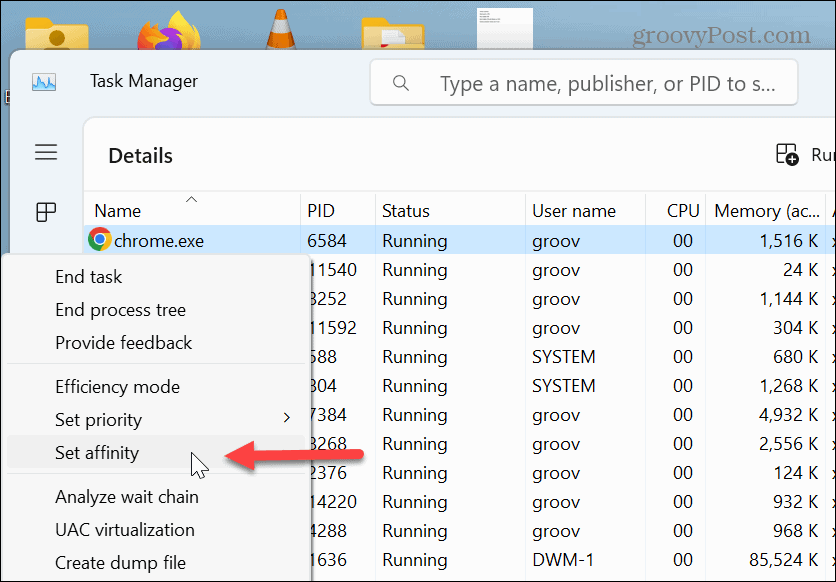
- Right-click the app you want to modify.
- Select the Set affinity option from the menu.

- Reduce the number of CPU cores the app or process can use and click OK.


Like changing the process priority, you can’t change processor affinity for essential system processes – only high-use apps.
Managing Apps on Windows 11
If you are experiencing issues where specific apps use too many CPU cycles, limit app CPU usage on Windows 11 using the above options for best system performance. Using these steps can also alleviate problems with an overheating processor.
In addition to the CPU, there are other problems you might run into with Windows 11. For example, your graphics card might be overstressed, and you’ll need to fix high GPU usage. To help prevent a problem with the GPU, learn how to monitor GPU performance on Windows.
Also, you will want to monitor your system’s RAM on Windows 11 and familiarize yourself with other hardware and system specs. And if you rarely restart or shut down your computer, you might want to look at the Windows 11 PC uptime.


