How to Automatically Backup Your WordPress Site with UpdraftPlus

In this article we’ll show you how to install this plugin, how to configure it, and how to recover from the backups that it takes for you.
When you have your own WordPress site, the worst-case scenario is your site getting deleted or defaced in some way. This may be due to getting hacked, infected with malware, server problems. The best insurance policy against losing your site is to install an automatic backup solution — we like UpdraftPlus.
UpdraftPlus is one of the most popular WordPress backup plugin solutions. It’s one of the highest-rated plugins at wordpress.org. It may be free, but its basic free functionality is beneficial.
What is UpdraftPlus
UpdraftPlus is a WordPress plugin you can install and configure to either do manual or automatic WordPress backups.
It’s easy to use, and includes all of the following features:
- It has been tested with backing up sites as large as 100 GB but doesn’t limit the size
- Backs up both WordPress files and site databases
- Includes incremental or full backups set on any schedule
- Supports various backup storage options: Cloud, FTP, or email
- Supports a large number of cloud services including Google Drive, Dropbox, Amazon Web Services, and many more
- One-click restore using any of your backups
Once you have UpdraftPlus installed and configured on your WordPress site, it’ll manage regular backups for you at the schedule you’ve defined.
In this article, we’ll show you how to install this plugin, how to configure it, and how to recover from the backups that it takes for you.
Installing UpdraftPlus
Installing the UpdraftPlus is simple, and no different than installing any other plugin.
To get started, log into your WordPress site and select Plugins from the left navigation menu. then select Add New from the pop-out menu.

To find UpdraftPlus for WordPress, type updraft in the search field at the top. You should see Updraft WordPress Backup Plugin in the list of plugins below.
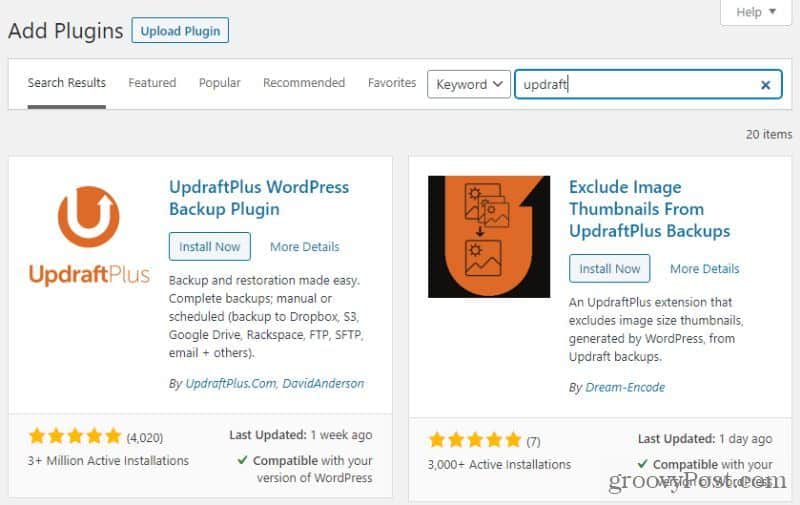
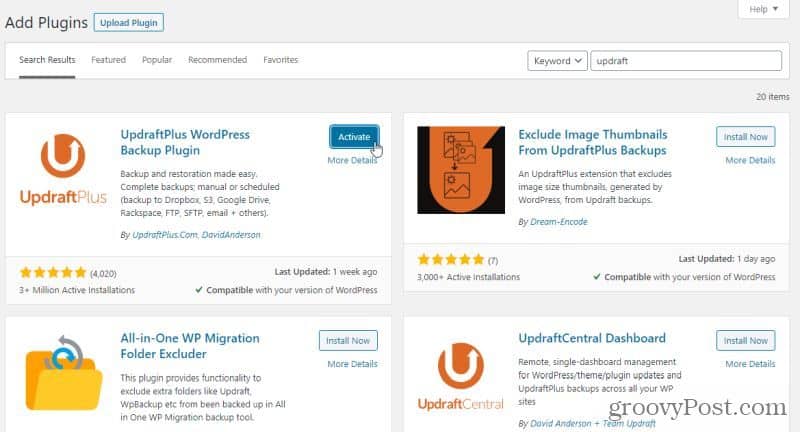
Select the Install Now button to initiate the plugin install process. Once the installation process is complete, an Activate button will appear.
Select the Activate button to enable it on your WordPress site.
Since the default settings of UpdraftPlus set site backups to occur manually, backups won’t automatically start even if you activate the plugin. You’ll need to work through the settings and configure automatic backups if you’d like them to occur on a regular basis without your input.
In the next section, we’ll take a look at how you can configure the free version of UpdraftPlus to do backups automatically on a frequency you prefer. You’ll also learn how to set up where you want to save those backup files.
Setting Up UpdraftPlus
The first step in setting up the UpdraftPlus plugin is configuring the frequency of backups. To get started with this, select Plugins from the left WordPress menu, and then select Installed Plugins from the submenu.
Scroll to UpdraftPlus – Backup/Restore in the list and select Settings from the list of links underneath it.

The UpdraftPlus Settings menu includes a number of tabs. Many of these only include Premium settings, so unless you’ve upgraded to the paid version, you won’t need to explore these.
UpdraftPlus Premium
If you do upgrade to the paid version, some of the features in these menus include:
- Create a custom folder in the cloud service where you’ve set up your backups
- Encrypted database backups
- Clone and migrate your site to a new domain
- Only take incremental backups (only new changes)
- Expert developer support
- Automatically take backups prior to any site updates
- Backup non-WordPress files and databases
- Backup a network of WordPress sites with one UpdraftPlus plugin
- Choose exact calendar dates and time for WordPress backups
- Support for WP-CLI commands for managing backups
- Encrypt your database backups
- Additional cloud storage locations
- Advanced report and email features
- No ads in the plugin settings pages
- Restore backups taken by other plugins
- Lock out access to UpdraftPlus for other admin users
- Access to an UpdraftVault cloud storage account
UpdraftPlus premium isn’t terribly expensive. You can sign up for a personal two-site plan for $70 at signup, and only $42/year afterward. If you need to backup 10 or more sites then you’ll want to consider the Business, Agency, or Enterprise plans.
Configuring UpdraftPlus
The first tab you’ll want to start with is the Settings tab. This is where you set up the backup frequency and your cloud storage location.
For both Files backup schedule and Database backup schedule, use the dropdown selector to choose which frequency you’d like to back up your WordPress site.

Choose the backup schedule carefully. Typically, you can use the following guidelines to choose your backup schedule. If you update your site:
- Many times a day: You’ll want to choose a backup schedule from Daily to Every hour.
- A few times a week: You would be okay with choosing Weekly.
- Less than weekly: You could get away with setting a Fortnightly or Monthly backup schedule.
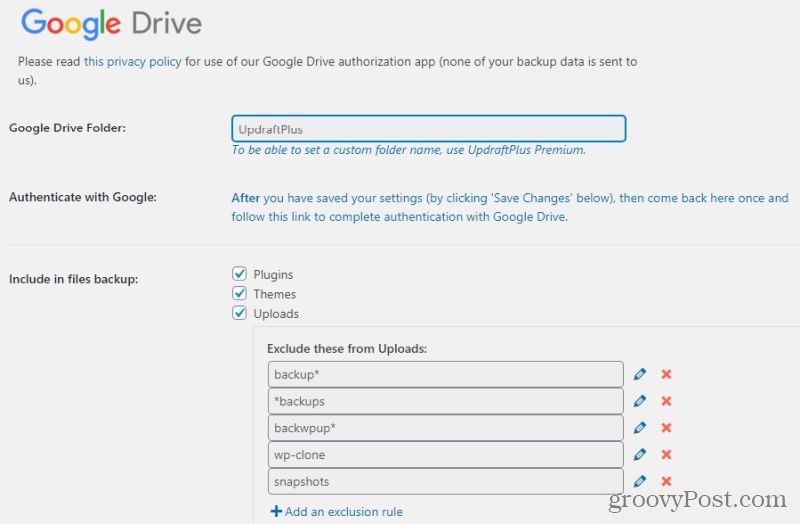
Scroll down the page to the cloud storage section and choose from one of the available cloud storage services you want to use. Depending on the service you choose, the page options will change.
If you’re using the free version of the plugin, the folder name for your backups will stay as default. Choose what WordPress files you want to include in the backup.
Further down the page, there’s an option to enable having a basic email report sent to your email address. This is useful if you want an alert when backups are performed.
You’ll need to provide UpdraftPlus with authorization to access your cloud storage account. Just select the link in the pop-up window and follow the instructions to provide authorization.

Once you’re done, just select Save Changes at the bottom.
Now UpdraftPlus is fully configured to take backups automatically. It will start taking the first site backup immediately.
Triggering and Restoring Backups
Even though UpdraftPlus is configured to take automatic backups, you can also trigger a manual backup any time you like.
To do this, select the Backup / Restore tab. Select the Backup Now button to trigger a new site backup immediately.

This will initiate a new backup and store the files and database in your cloud storage account.
Whenever you want to recover one of your previous backups, you can do so from this same tab. Just scroll to the bottom and find the backup date that you want to recover.

Select the Restore button to initiate the backup wizard. This wizard will take you through a few steps to perform the backup. This includes choosing which specific components you want to restore.

There are some cases where the recovery process may not work from within the UpdraftPlus plugin wizard. If this happens, you can always use any FTP client to transfer the files from your backup location to your web server and replace those files manually. You can also use the phpAdmin tool in your web host control panel to recover your WordPress database from your UpdraftPlus backed-up database.
Managing your WordPress backups and recovery events with UpdraftPlus will simplify the process greatly. It’s also a nice way to have peace of mind that should anything catastrophic ever happen to your site, you’ll be able to recover your site quickly.


