What Is WordPress?
What is WordPress? WordPress is a website and blogging platform that allows you to build and manage a website quickly and easily. Here we explain what you need to know.
What is WordPress? WordPress is a website and blogging platform that allows you to build and manage a website quickly and easily.
After the blogging software b2/cafelog was discontinued in 2003, two users – Matt Mullenweg and Mike Little – decided to build a new open-source blogging platform to replace it. On May 27, 2003, they announced the first version of the WordPress blogging platform.
Since then, millions of users adopted the platform across the world. Thousands of developers built countless themes and addons to enhance the platform. Today, WordPress is the single most popular choice for website owners everywhere.
What Is WordPress?
There are two ways you can use the WordPress blogging platform. You can sign up for a free website at WordPress.com. Or, you can visit WordPress.org and download an installable copy of the WordPress software to launch a website on a web hosting server. Many web hosting companies will even set up an instance of WordPress for you to use.
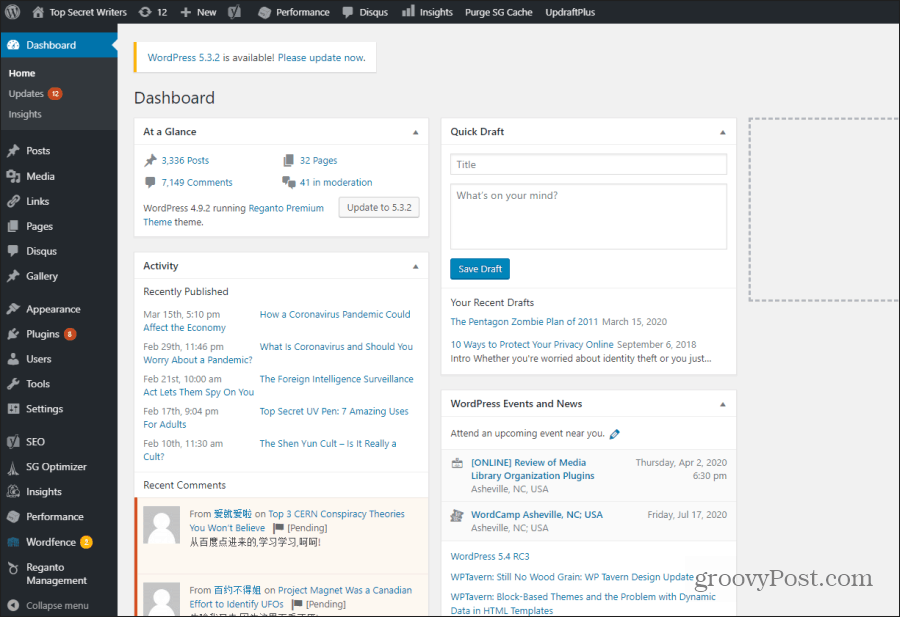
Whatever method you use to access the WordPress platform, the interface always looks the same.
 s
s
The options you see on the left side of the WordPress interface will vary depending on your access permissions as a WordPress user. If you’ve logged in as an administrator, you’ll see everything.
You’ll also see additional options in the left menu when you install new WordPress addons or plugins. What are WordPress plugins? They are extensions to the base WordPress code that add new functionality to the platform.
Default options in the left menu that you can expect to see after a new WordPress install include all of the following.
- Posts: Add, edit, or update posts. You can also manage site categories and tags.
- Media: This is your media library where you can see all of the images and videos you’ve uploaded to your site.
- Links: Manage a set of links that will appear on your website when you use the Links Widget on your site.
- Pages: Add, edit, or update web pages on your site.
- Appearance: Manage your website’s themes, widgets, site menus, and plugins.
- Plugins: View, activate, or deactivate add-ons and plugins you’ve installed on your site.
- Users: Manage user accounts for administrators, editors, and writers.
- Tools: Export or import data to and from other content management systems.
- Settings: Customize your website, including the site title, address, site format, commenting, and most other features of your site.
When you install a WordPress plugin, new features may appear in the left menu, or within any of the existing menu options (usually the Settings menu).
Adding New Themes or Plugins
One of the first things people usually do after starting to use a new WordPress install is to add a new theme and several important plugins.
The theme you choose depends on how you’re planning to use your WordPress site. There are themes tailored for blogging, online sales, portfolio sites, and more.
The easiest way to install a new theme is by selecting Appearance from the left menu and then select Themes. Select Add New at the top.

This is where you can browse all of the free Themes that are available. You can install any of them instantly by hovering your mouse over the theme image and selecting the Install button.

Once installed, you should see the theme activated on the main Themes window. If the theme includes customization options, you can hover over it and select the Customize button.
If none of the free themes look good to you, you can search the many websites online for free or paid WordPress themes. When you buy a theme, you’ll receive it as a ZIP file.
In the same Add Themes page as above, select Upload Theme, and browse to wherever you saved the downloaded ZIP file. This will install the theme you downloaded from the external site.
How to Manage WordPress Posts
Managing posts in WordPress is very easy. To get started, select Posts from the left WordPress menu. Then, select either All Posts to see and edit any of your existing posts, or Add New to create a new one.

Important features you need to be aware of when creating a new post includes:
- Use the Visual tab to use the WordPress WYSIWYG editor, or Text to format your post using HTML tags.
- The Add Media button lets you insert images anywhere into your post.
- Select Save Draft to save the most recent version of your post, and Preview to see what it looks like on the live site.
- Under Categories on the right, select any category to organize your post there, or select Add New Category to create a new one.
- Under Tags on the right, add words or phrases that describe what your post is about. Tags you’ve already used will appear, so try to use existing ones if you can to avoid creating too many similar tags.
- Select Set featured image on the right to upload an image that will appear as the featured image at the top of your post.
- Under your post, you’ll see an Excerpt field where you can type a short synopsis of what your post is about, for Google to use in search results.
- You’ll see a list of widgets under your post, depending on what additional addons or plugins you’ve installed.
WordPress Pages Vs. Posts
When you select Pages from the left menu and select Add New, you’ll notice the editing page looks nearly identical to the one for posts. So, what’s the difference?
You’ll notice some differences on this page too.

Mainly, Categories and Tags are missing. This is because website pages, unlike blog posts, don’t need to be organized under site categories. Tags are also not required.
The main difference between a WordPress post and a page is that posts will get displayed on your site in reverse chronological order. This means the newest posts are listed at the top of the page on your site that displays all blog posts.
By contrast, a page isn’t part of any blogroll. It’s a static, standalone page on your site with its own URL. For example, if your website domain is MySite.com, and the title of your new page is “About Us”, then the URL of that static page will be MySite.com/about-us/
Keep in mind that you can organize this URL with sub-pages organize in a hierarchy under that parent page. You do this under Page Attributes on the right side of the New Post page. Just set the Parent dropdown to an existing page.
For example, if you create a new page titled “My Name”, and select the About Us as the parent, the URL for this new page will be MySite.com/about-us/my-name/.
Managing WordPress Media
When you select the Upload Media button when editing a post or a page, you will have the option to upload an image into the page by selecting the Upload Files tab.
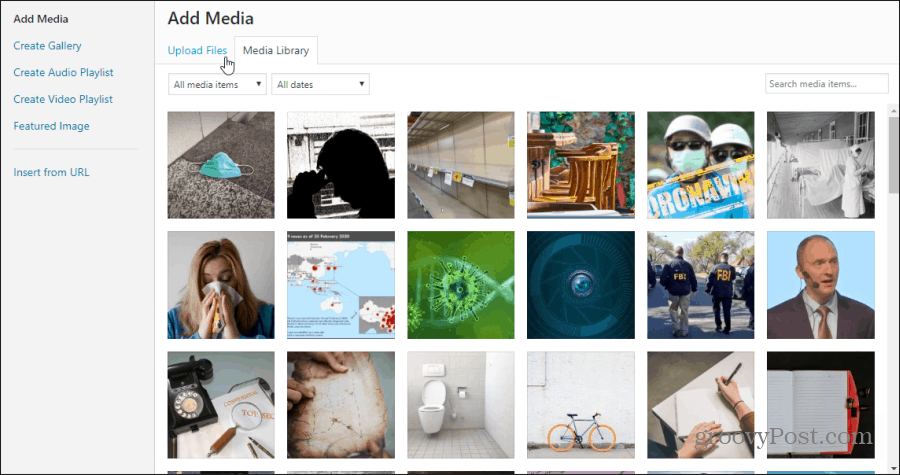
Once you use this feature to upload images or videos to your site. You can access all of these files by selecting the Media link on the left menu.
This lets you view and edit attributes related to any image on your site.

These attributes include:
- Title
- Caption
- Alt Text
- Description
All of this image is meta-data connected to the image. But only the caption will appear on the website if you include one. The alt text is also important to add, as this is displayed for visually impaired internet users. It’s also used by the Google crawler (and other web crawlers) to identify the content of the image.
Customizing Blog Settings
When you select Settings from the left WordPress menu, you’ll see a list of options you can use to further customize your WordPress site.
- General: Set your site title, tagline, URL, admin email, default user role, site language, site timezone, and the date and time formats.
- Writing: Set default categories and post format as well as mail server settings.
- Reading: Assign home page display settings, a number of posts to display in the blogroll and feeds, and to add or remove search engine visibility.
- Discussion: Configure default article and comment settings, email notifications, comment appearance, moderation, blacklists, and avatars.
- Media: Set image defaults like sizes and how to organize uploaded files.
- Permalinks: Configure the site’s default URL settings.
You’ll see additional options inside the Settings area if you’ve installed any WordPress addons to your site. There are a few WordPress plugins that every website owner should install immediately after installing WordPress.


