How to Automatically Forward Emails in Gmail

Save time and streamline your emails with automatic email forwarding in Gmail to merge several inboxes into one. This step-by-step guide helps you set it up.
Do you want to save time and hassle by forwarding your emails from one account to another? You might have multiple email addresses for work and personal use, but you’d rather handle them all in one place. Maybe you want to send specific emails to a different account as a backup or for security reasons.
Whatever your reason, Gmail makes it easy to forward your emails to another account automatically. You can set up filters to forward specific messages based on criteria like the sender, subject, or using certain keywords. You can also forward all your incoming messages to one address.
We’ll show you how to automatically forward emails in Gmail using the methods below.
Why Should You Forward Emails in Gmail?
You might want to forward emails in Gmail for several reasons. Here are some of them:
- Manage multiple email accounts from one inbox. This way, you don’t have to switch between different tabs or apps to check your messages.
- Keep a copy of important emails in another account for backup or security purposes. For example, if you receive invoices or receipts via email, you can forward them to a separate account for record-keeping.
- Share relevant emails with someone else without having to forward them every time manually. For example, if you receive newsletters or updates that interest your spouse or colleague, you can automatically forward them to their address.
- Filter out unwanted or spam emails by forwarding only the ones that matter to you. For example, if you receive many promotional emails that clutter your inbox, you can forward only the ones that offer discounts or deals that interest you.
If this sounds good, you can start forwarding your emails using the Gmail website or the mobile app for Android, iPhone, and iPad.
How to Forward Specific Emails in Gmail Using a PC or Mac
You can use filters to forward specific emails in Gmail based on certain criteria, such as sender, subject, or keywords. Filters are rules that tell Gmail what actions to take when an email matches certain conditions.
Creating filters to forward emails automatically is easily done using the Gmail website. You can do this using a PC, Mac, or Chromebook. Android and iPhone users cannot change these settings (at present) and will need to sign into Gmail using their web browser on another device instead.
To create a filter and forward specific emails in Gmail:
- Open the Gmail website in your web browser and sign in with your account.
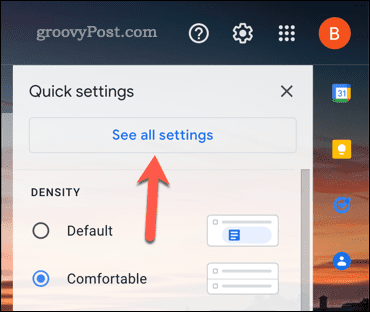
- Click the gear icon in the top-right corner and click See all settings.

- Click the Filters and blocked addresses tab at the top of the page.
- Next, click Create a new filter at the bottom of the page.

- Enter the criteria that define which emails you want to forward in the fields provided. For example, you can enter an email address in the From box, a word or phrase in Subject, or a keyword in Includes the words. Advanced operators like OR, AND, or – (minus sign) can also be used for more precise filtering.
- When ready, click Create filter in the bottom-right corner.

- Check the box next to Forward it to and choose an email address from the drop-down menu. If the address isn’t listed, click Add forwarding address first.

- Add a new forwarding address in the Forwarding and POP/IMAP tab when redirected.

- Once you’ve added a forwarding address, return to the Filters and blocked addresses tab and click Create a new filter again to restart the process.
- In the filter options menu, you can also check other boxes to perform other actions alongside forwarding the email, such as Mark as read, Delete it, or Apply the label.
- To finish the rule, click Create filter again to save your settings.


At this point, your filter is now active.
Whenever an email matches your filter criteria, it’ll be automatically forwarded to the chosen address. Any other rules you applied (such as marking the email as read automatically) will happen, too.
How to Forward All Emails in Gmail On a PC or Mac
If you want to forward all your incoming messages to one address without creating filters, you can set Gmail to do that using the forwarding option in your Gmail settings.
The easiest way is to use the Gmail website on your PC, Mac, or Chromebook. Currently, you can’t change your Gmail forwarding settings using the mobile app, so Android and iPhone users must follow these steps on another device.
To enable forwarding and forward all emails in Gmail on a PC or Mac:
- Open the Gmail website and sign in with your account.
- Click the gear icon in the top-right corner and click See all settings.
- Click the Forwarding and POP/IMAP tab at the top of the page.
- Under Forwarding, click Add a forwarding address.
- Enter an email address to which you want to forward your messages and click Next.
- Confirm your request by clicking Proceed.
- Check your inbox for a confirmation email from Google.
- Open the email and click on the confirmation link—follow any additional on-screen instructions.
- Return to the Forwarding and POP/IMAP section in your Gmail settings.
- Under Forwarding, select Forward a copy of incoming mail to and select the forwarding address from the drop-down menu. This is the email address that will receive your forwarded emails.
- Optionally, you can also choose what to do with the original message after forwarding it. You can keep it in the inbox, mark it as read, archive it, or delete it.

- When you’re ready, click Save Changes at the bottom of the page.


If you followed the steps correctly, all incoming messages will be automatically forwarded to the chosen address. You can repeat these steps to switch the setting off at any point.
Managing Your Gmail Inbox
Forwarding emails in Gmail is a convenient way to control your inboxes without copying and pasting or forwarding each message individually. You can set up automatic forwarding for all your emails or create filters to forward only specific ones based on certain criteria.
If you’re new to Gmail, you might not know about other things you can do. For instance, you could start by organizing your Gmail inbox, and using features like labeling to categorize your emails.
Want to lose (but not delete) some of your emails from view? You can hide emails in Gmail easily using Gmail’s archive feature.


