Do These Things Before Installing macOS High Sierra 10.13

A new version of macOS called High Sierra version 10.13 is now available for your Mac. Here are some steps you should take before upgrading.
In addition to the new iOS version 11, Apple also released its latest revision of its desktop operating system, macOS High Sierra. High Sierra, version 10.13 sounds more like a minor revision of the previous release, Sierra 10.12. Computers running Mac OS 10.7.5 can upgrade for free on supported devices. Users should take heed though and perform the necessary steps to prep their Macs for the new update. That’s because High Sierra uses an entirely new file system called APFS.
We detailed APFS earlier this year during our prep for the upgrade to iOS 10.3. Unlike iOS though, macOS is a more complex creature; due partly to its need to support third-party applications that are not as curated and carefully managed as those found in the app store on iOS.
The desktop is more exposed, too, with a file manager and more free range to roam, unlike iOS where there are strict guidelines for app developers and behaviors for end users. Apart from the under the hood improvements, High Sierra comes with new features that give its predecessor a lot of fit and finish. In this article, we cover some things you should do before you download and install High Sierra on your Mac.
Prepare Your Mac Before Installing macOS High Sierra 10.13
Update All Your Apps
Apps will need to be modified to support High Sierra’s file system, especially disk tools. But for other apps like Microsoft Office and Adobe Creative Cloud, make sure you have updated versions installed so you are not in a chicken or the egg situation after reaching the desktop. This Macrumors thread has a comprehensive list of compatible and incompatible apps. You might want to peruse first before taking the leap.

Back Up Your Current Installation of macOS Now
The first thing you should do is determine if your Mac is compatible with High Sierra. It turns out the new file system has a high preference (no pun) for SSD based Macs. Macs such as the iMac with fusion drives are currently not supported by APFS and will instead continue to use HFS+. Apple plans to add support in the future. Here is a list of supported Macs:
- MacBook (Late 2009 or newer)
- MacBook Pro (Mid 2010 or newer)
- MacBook Air (Late 2010 or newer)
- Mac mini (Mid 2010 or newer)
- iMac (Late 2009 or newer)
- Mac Pro (Mid 2010 or newer)
Not all features in High Sierra are supported on older Macs, for example, the new HEVC video codec requires newer hardware such as the 2017 and 2016 MacBook Pro’s. For more details about features supported by model, check Apple’s website.
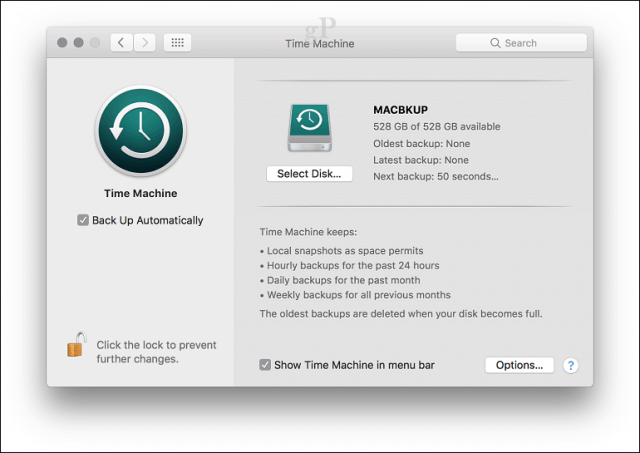
If your Mac is running macOS 10.12 (Sierra), 10.11 (El Capitan) or earlier, make sure you perform a full time machine backup. High Sierra will convert the file system your Mac currently uses called HFS+ to the new APFS. There is no easy way to go back because earlier file systems are unrecognized by APFS. So, you won’t be able to easily restore a Time Machine backup without formatting to the old HFS+ file system first.
Create a Bootable Copy of macOS Sierra 10.12
If you find out High Sierra is not to your liking, you will need an easy way to downgrade. Having a bootable copy of macOS Sierra on hand can help. There are multiple ways to create a bootable copy of macOS, the easiest is Disk Creator by MacDaddy.io. All you need is an empty 8 GB thumb drive or larger and a copy of the macOS app you can download from the App Store.
Launch Disk Creator, choose the USB drive where your install files will be stored, click Choose a macOS installer, then select the macOS Sierra app. Click Create Installer.

Click Erase disk when prompted then enter your password. If you have any important files on the drive, click cancel, then back them up first.

Creating the install media will take some time, so, monitor the progress bar at the bottom of the Disk Creator window.

When complete, set it aside and go ahead and install macOS High Sierra when the time comes.

How to Reinstall an Earlier Version of macOS if You Need to
If something goes wrong and you need to reinstall your older version of macOS, here is how you do it.
Power down your Mac, connect the USB drive on the macOS installer, then start your Mac. Immediately hold down the Option key until the boot menu appears. Select the Install macOS media then hit Enter. When you arrive at the macOS Utilities screen select Disk Utility then click Continue

Select Macintosh HD or the name of your startup drive then click Erase.

Choose Macintosh Journaled then click Erase. This is important because High Sierra modifies the drive making it impossible to even restore from a Time Machine backup. When complete, exit Disk Utility.

Select Restore from Time Machine Backup then follow the instructions for restoring your backup.

After your Time Machine Backup, restart your Mac and you should be back in your old version. In the meantime, you can wait it out and continue with the older version for time being. I’ve seen users happily use Macs with versions as old as 10.6; so, don’t feel too bad being a version or two behind.
Are you ready for macOS High Sierra? If so, tell us what you are excited about in the new version.


