How to Switch User Accounts on Windows 11

If you have created multiple users on your PC, you’ll need to know how to move between them. Here’s how to switch user accounts on Windows 11.
If you’re sharing a computer, it’s a good idea to add other user accounts. That way, each user can adjust their own settings, use their own apps, and keep their data away from other users.
In addition to adding a user with a Microsoft account, you can add a local user if you want. But regardless of the type of account, you’ll need to know how to switch between different user accounts on Windows 11.
After creating multiple user accounts, you can use different methods to switch between them. Here’s how to do it.
How to Use the Start Menu to Switch User Accounts on Windows 11
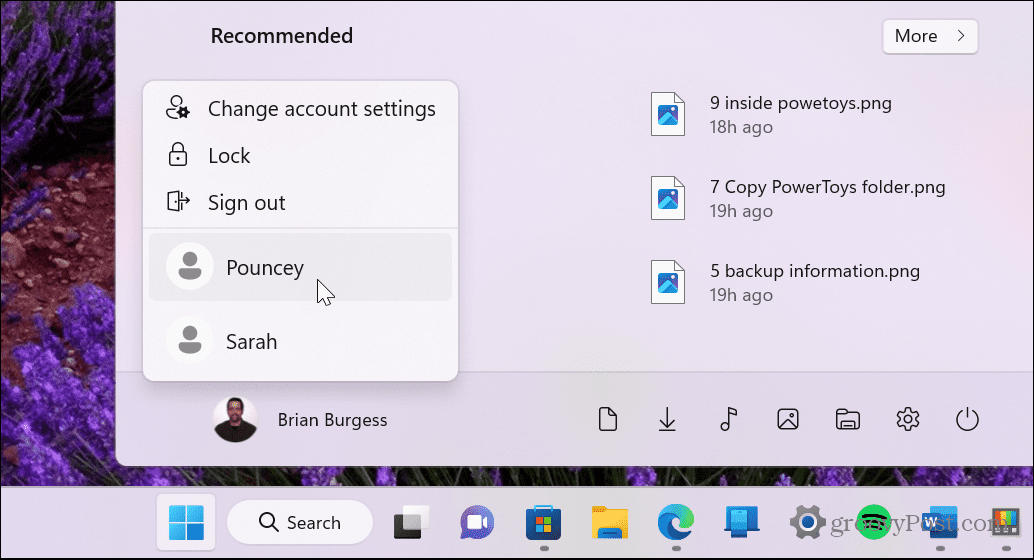
One of the most straightforward ways to switch user accounts on Windows 11 is by using the Start menu.
To switch users via Start on Windows 11, use these steps:
- Press the Windows key on your keyboard to launch the Start menu.
- Click your user account button in the lower-left corner and choose the user account you want to access.

- After choosing the user account, Windows 11 will switch to the sign-in screen for your selected account so you can log in.

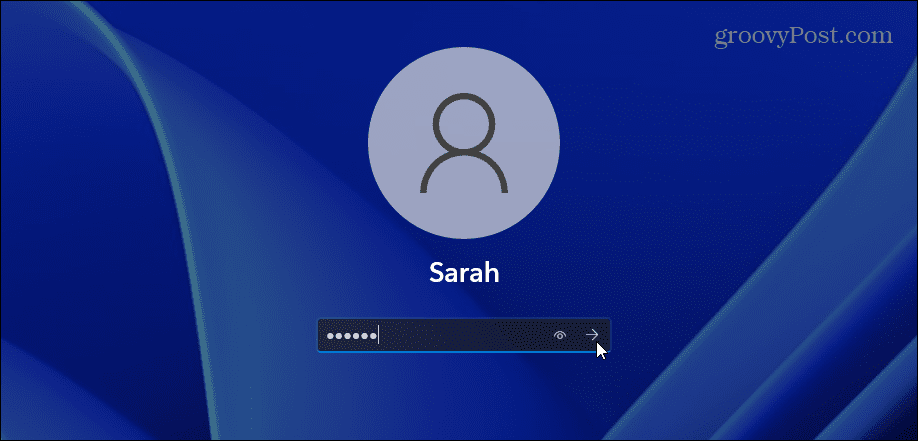
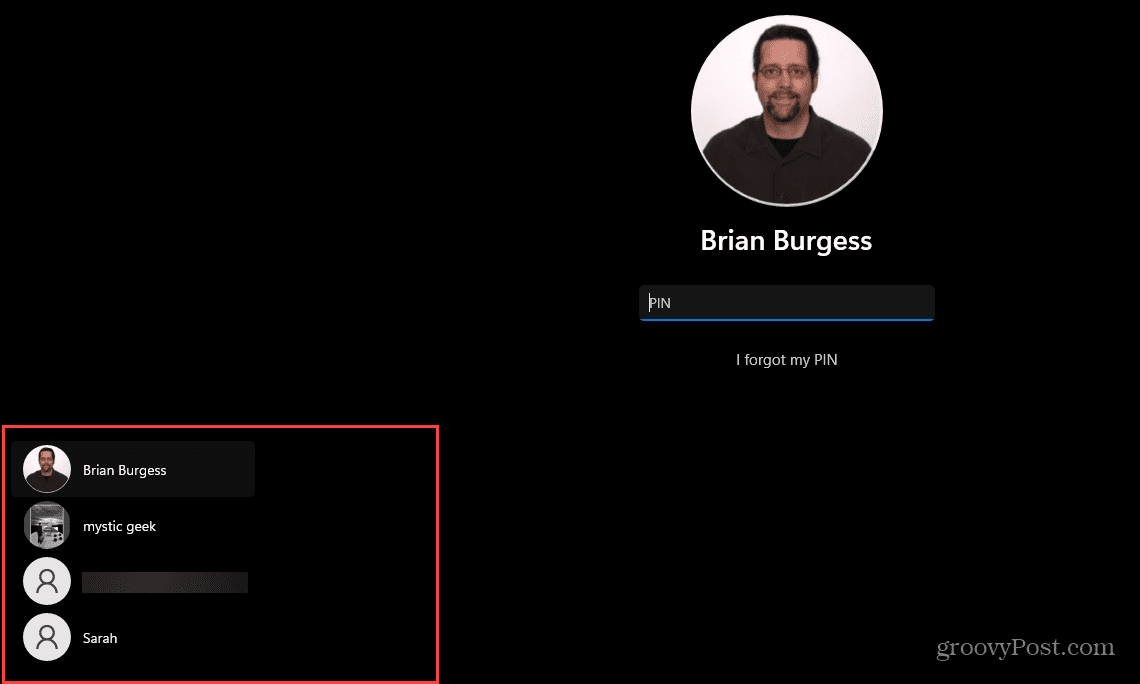
How to Switch User Account via Sign-in Screen
You can switch users from the sign-in screen if you have multiple user accounts set up on your shared PC. The sign-in screen is the one that appears after clicking through the lock screen.
To switch users from the sign-in screen on Windows 11:
- Log out of your account.
- Find the user account you want to switch to in the lower-left corner of the screen.

- Select the user to begin signing in with that account.

It’s also worth noting that you can get to the lock screen to switch user accounts using the Windows key + L keyboard shortcut.
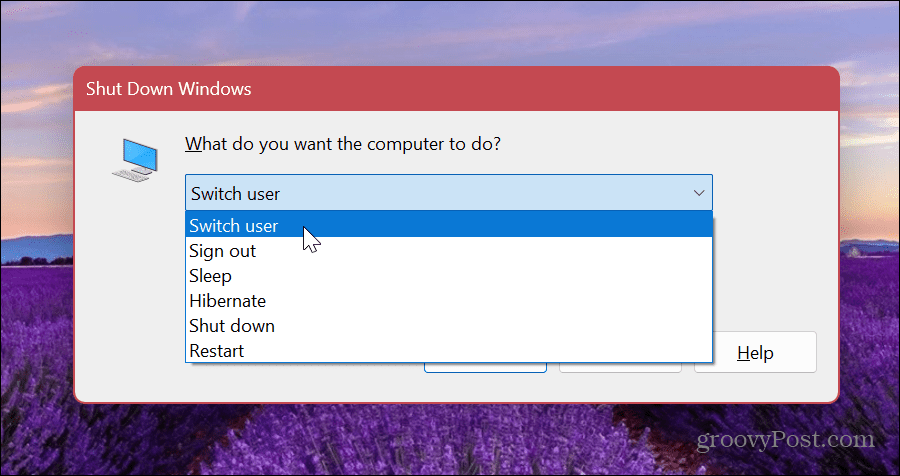
How to Use Alt + F4 to Switch User Accounts on Windows 11
You can also use the “old school” Alt + F4 shortcut to open the shut down screen on Windows 11. Using this shortcut is also an easy way to shut down or restart Windows.
To use the shut down Windows menu to switch user accounts:
- Ensure no apps or other windows are selected and hit Alt + F4 on your keyboard.
- The shut down Windows menu will appear.
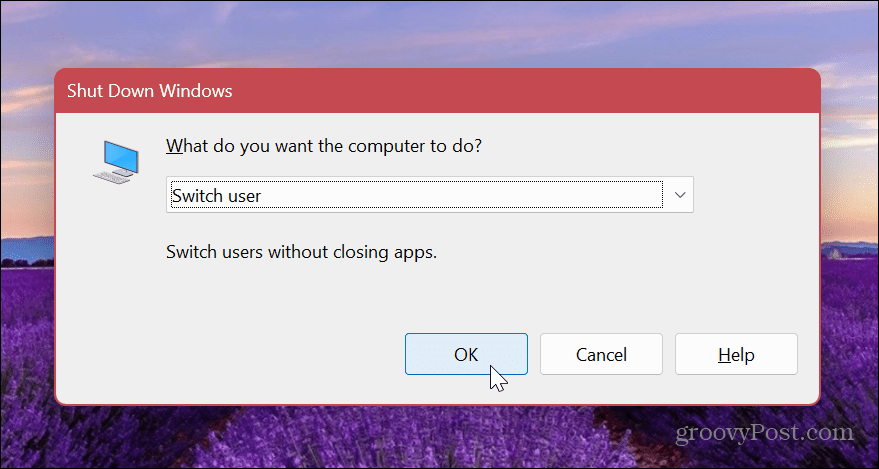
- Click the dropdown menu and select the Switch user option.

- Click the OK button.

- Windows will log you out and bring you to the sign-in screen—select a different account from the bottom right corner.
- Sign into the account with the proper credentials.

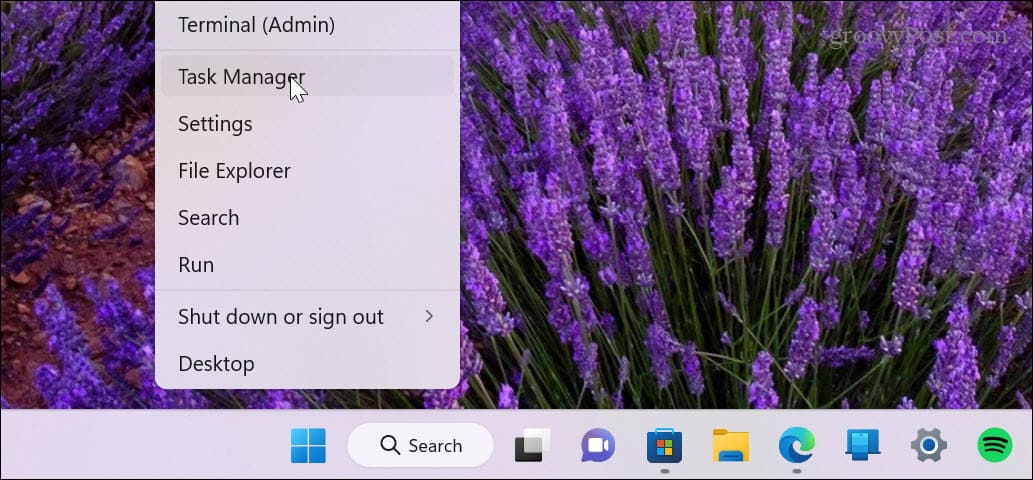
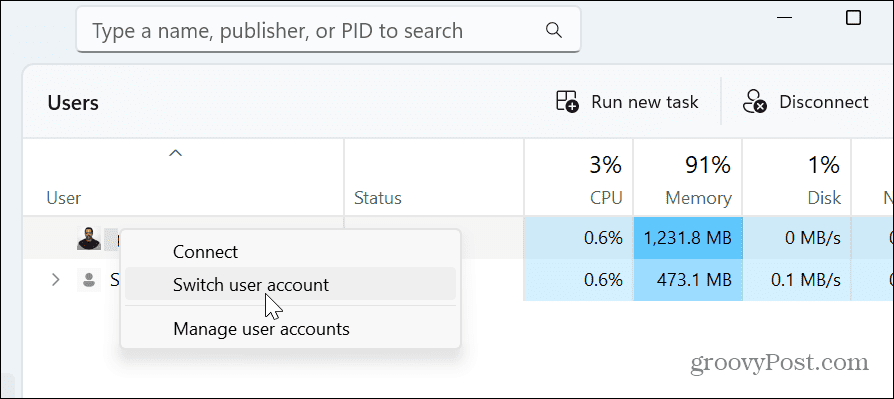
Use Task Manager to Switch User Accounts on Windows 11
Another little-known way to switch user accounts on Windows 11 is via Task Manager. Unfortunately, the option isn’t as straightforward as the above options, but it works nonetheless.
To switch users via Task Manager:
- Right-click the Start button and select Task Manager from the menu.

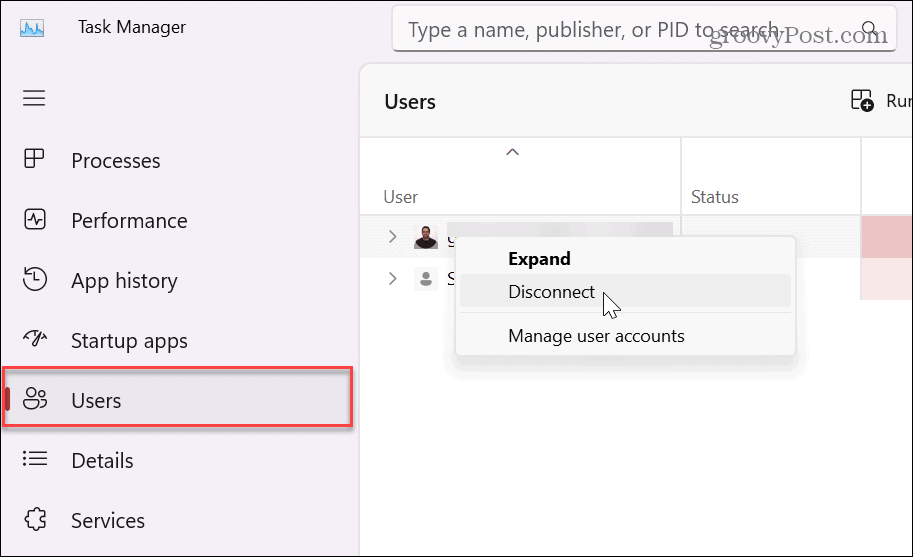
- When Task Manager opens, select the Users tab.
- Right-click the account you want to log out from and choose Disconnect.

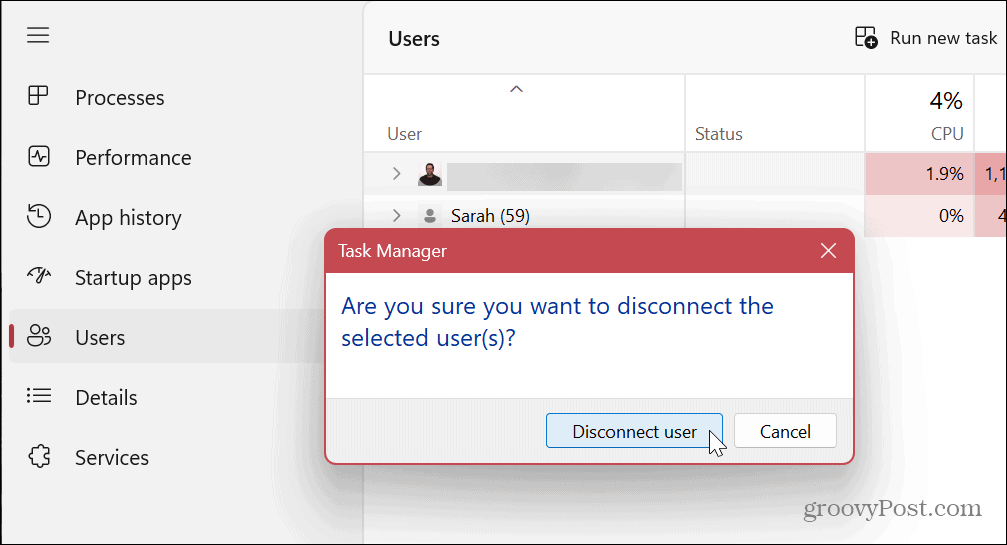
- Click the Disconnect user button when the verification message appears.

- If you are using multiple accounts simultaneously, right-click a user account and select Switch user account.

Whichever option you choose from the Users tab in Task Manager, it will kick you back to the sign-in screen so you can choose a different account from the lower left corner of the screen.
Managing User Accounts on Windows 11
Creating multiple user accounts is a must-have feature for office, school, and home environments with a shared PC. If you need to switch user accounts on your PC, you can use any of the above options. The nice thing is having options so you can switch accounts while you are anywhere in the OS without much hassle.
If you have a shared PC or need multiple accounts, learn how to add a user account on Windows 11. You may also need to set up an account for a user without a Microsoft account or create an account for yourself. In that instance, you need to create a local user account.
If you need to restrict a person’s access level, you’ll need to change the account type. If you want to personalize your own account, you can also change your account name.


