EaseUS Provides Stress-Free Data Recovery for Mac Users

One of our favorite Mac apps continues to express. The EaseUS Data Recovery Wizard Pro 12.0.5 provides various tools not found on macOS alone. These include the ability to completely recover data, regardless of why the items were deleted. Better still, if your Mac includes Apple’s new T2 chip, EaseUS Data Recovery for Mac is the first and only data recovery software that allows you to scan and restore T2 chip protected data.
What is EaseUS Data Recovery Wizard for Mac?
Data loss isn’t new, and it can happen under various scenarios. Chief among these is you simply deleted the file, and now you need it. Files also get lost due to corruption during repartitions and when drives are unmounted. Unfortunately, many of the reasons for data loss is beyond your control, such as a virus attack, system crash, macOS software bug, hard drive damage, and other situations.
EaseUS Data Recovery Wizard for Mac offers three primary functions starting with photo recovery. Through this process, it can help restore photos once stored on your Mac. It can go further, however, by also finding images from an attached camera, memory card, or a USB drive.
For videographers, EaseUS can recover and restore missing films, TV shows, clips, camera videos, and more. And yes, it supports any formats of video files.
Finally, there’s backup recovery, which is perhaps EaseUS’s most crucial tool to date. Through Time Machine backup, Apple makes it relatively easy to keep copies of files on a Mac. Unfortunately, finding those files later for recovery isn’t a simple process. EaseUS takes the guesswork out of data recovery from Time Machine backups. The feature is missing from similar data recovery apps on the market.
Other Noted Features
There are other critical EaseUS features worth noting, each designed to make the overall restore process more comfortable and user-friendly. The process starts with a quick automated scan process.
Once the scan process is complete, attention can turn to the recovery process. Finding your missing file(s) begins with a terrific filter process that’s powered by keywords and various sourcing tools. The built-in file preview feature means you can look at a file before recovery, just to be sure it’s the one you want, thereby saving you time.
The Fine Print
Besides the physical drive found on your Mac, EaseUS supports attached devices, including cameras, camcorders, and other video players, SD and similar memory cards, USB Drives, and more. File systems supported include APFS, HFS+, HFS X, FAT16/32, exFAT, and NTFS.
The app works with macOS versions going back to macOS 10.9 Mavericks, which was released in 2013. Ideally, however, your Mac should be using the latest version of macOS. EaseUS supports the recovery of multiple file formats, including those associated with documents, photos, video, music, and others.
You can find the latest requirements and supported drives and files on the official EaseUS website.
Recovering Data Using EaseUS
The first time you open the EaseUS Data Recovery Wizard for Mac, you’ll be asked to identify, then scan the available partition or drives.
To get started:
- Open the EaseUS Data Recovery Wizard. (The steps assume you’re using the Pro version of EaseUS. See pricing info below for a special groovyPost discount)
- Click Scan at the bottom right, then wait for the process to complete.
The scanning process can be a long one, depending on the size of the drive. Luckily, once the scan is complete, you can keep a copy of it for later use (see below). Don’t worry about the ever-changing “remaining time” shown during the scanning process. I’ve scanned numerous drives with EaseUS, and this number was significantly inflated each time.
My suggestion: Make sure your Mac’s connected to power, then have a cup of your favorite drink while you want for the process to complete!
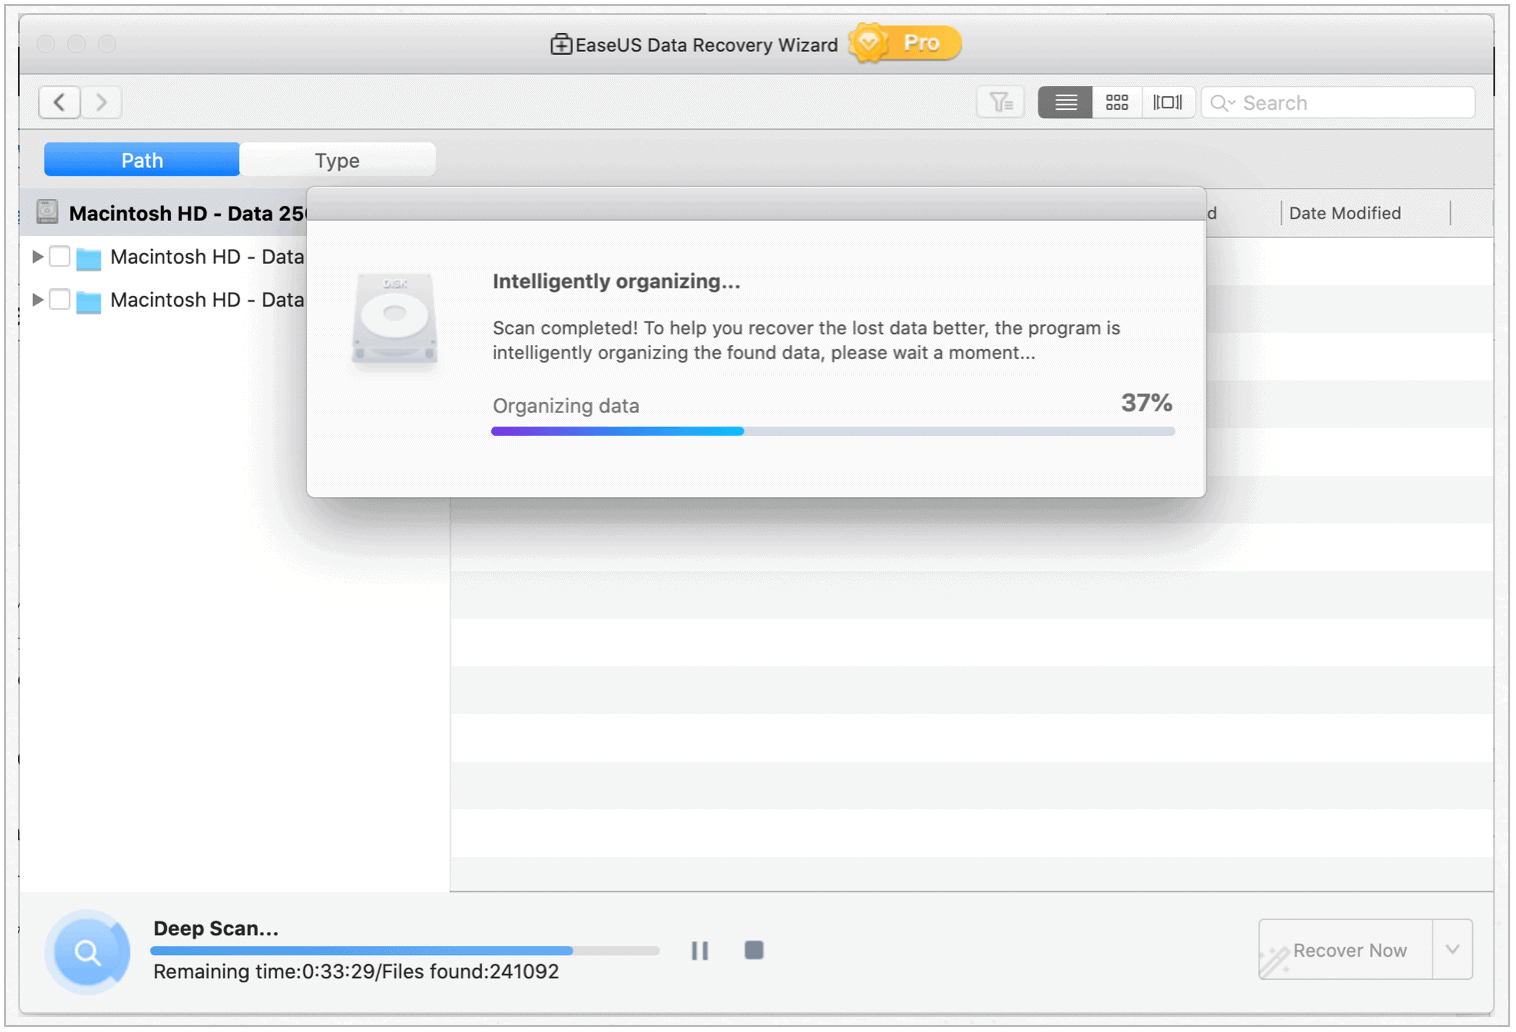
EaseUS presents scanned data by Path and Type. With the former, you’ll find content organized by the user. Under Type, files are identified by graphics, document, audio, video, email, archive, and others. Personally, the latter seems more natural, but your choice may be different.
Finding Data
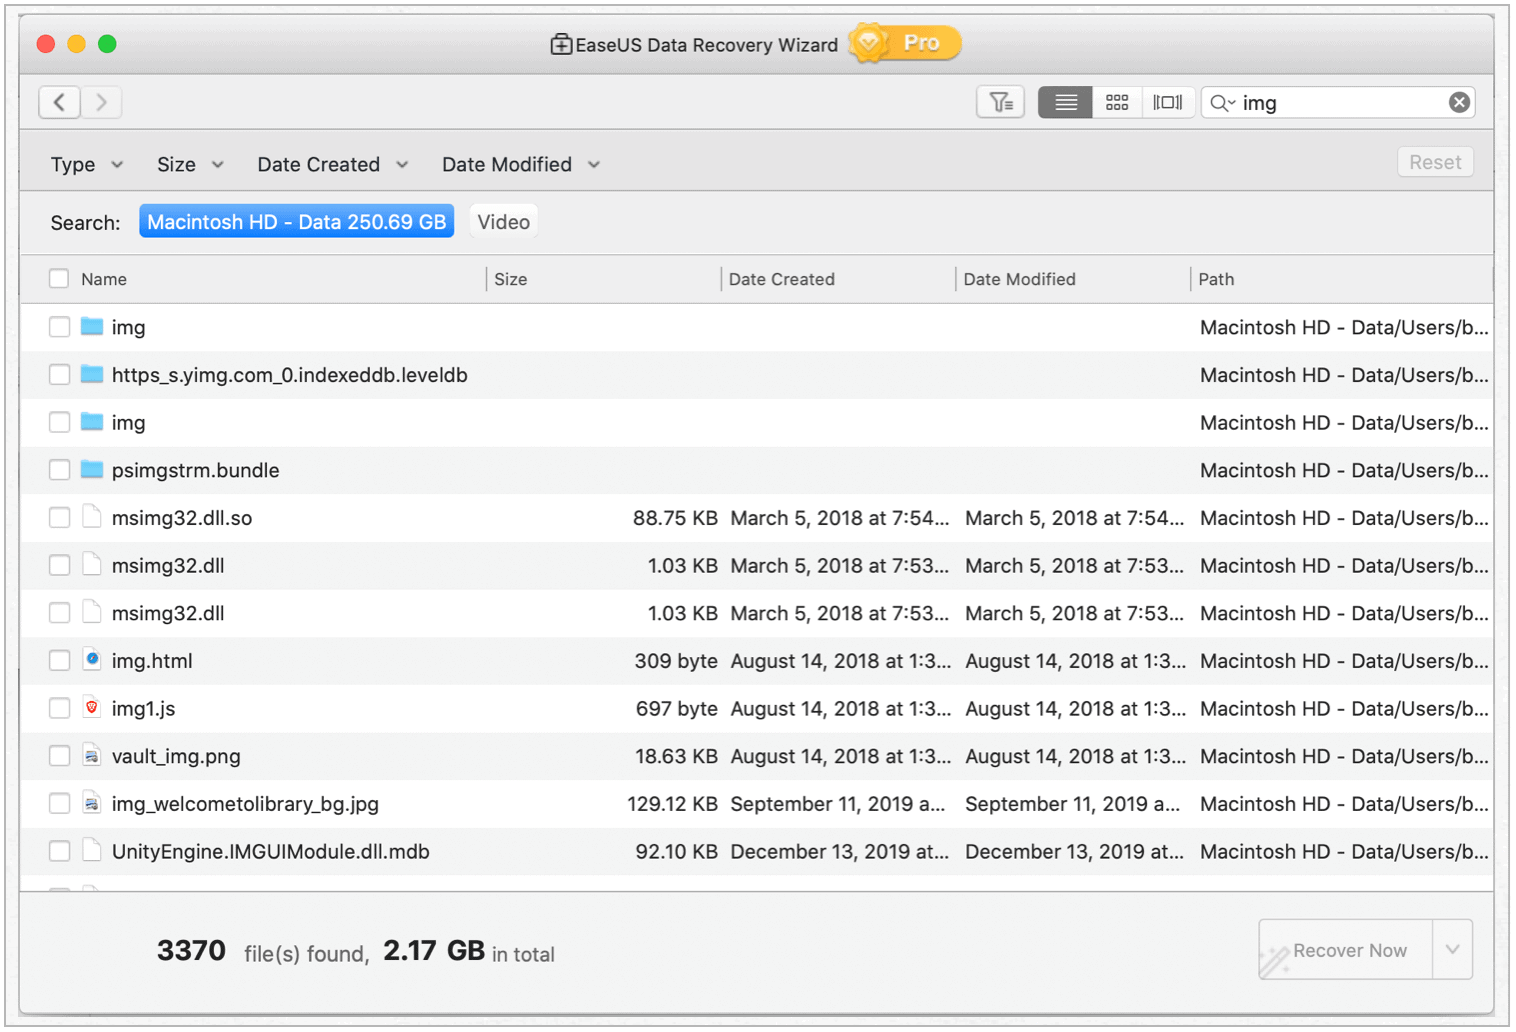
To find recoverable content, you can either drill down starting with the path/type, or use the software’s search function. There’s no right or wrong way to do so. Depending on what you’re looking for, a combination of each might work best.
The following example shows a search for “img.” As you can see, for each file found in the search, you can see its name, size, date created, date modified, and path. Scroll down to find more search results. You can double-click folders in search results to drill down further.
Previewing Data
To preview a file, double-click, when applicable. Data you can preview include video and photos, plus documents such as those written in Word and Pages. System files, not surprisingly, can’t be previewed.

What if I get Lost?
To start another search, you can also go back to the beginning by using the back arrow at the top left of the app. Doing so will clear your current search, however.
Recovering Files
As you find files to recover, check the box next to it. As you do, you’ll see the number and size of records checked off next to the Recover Now button. Once you’re ready to restore, click Recover Now. From there, find the place to put the files, then click Save.
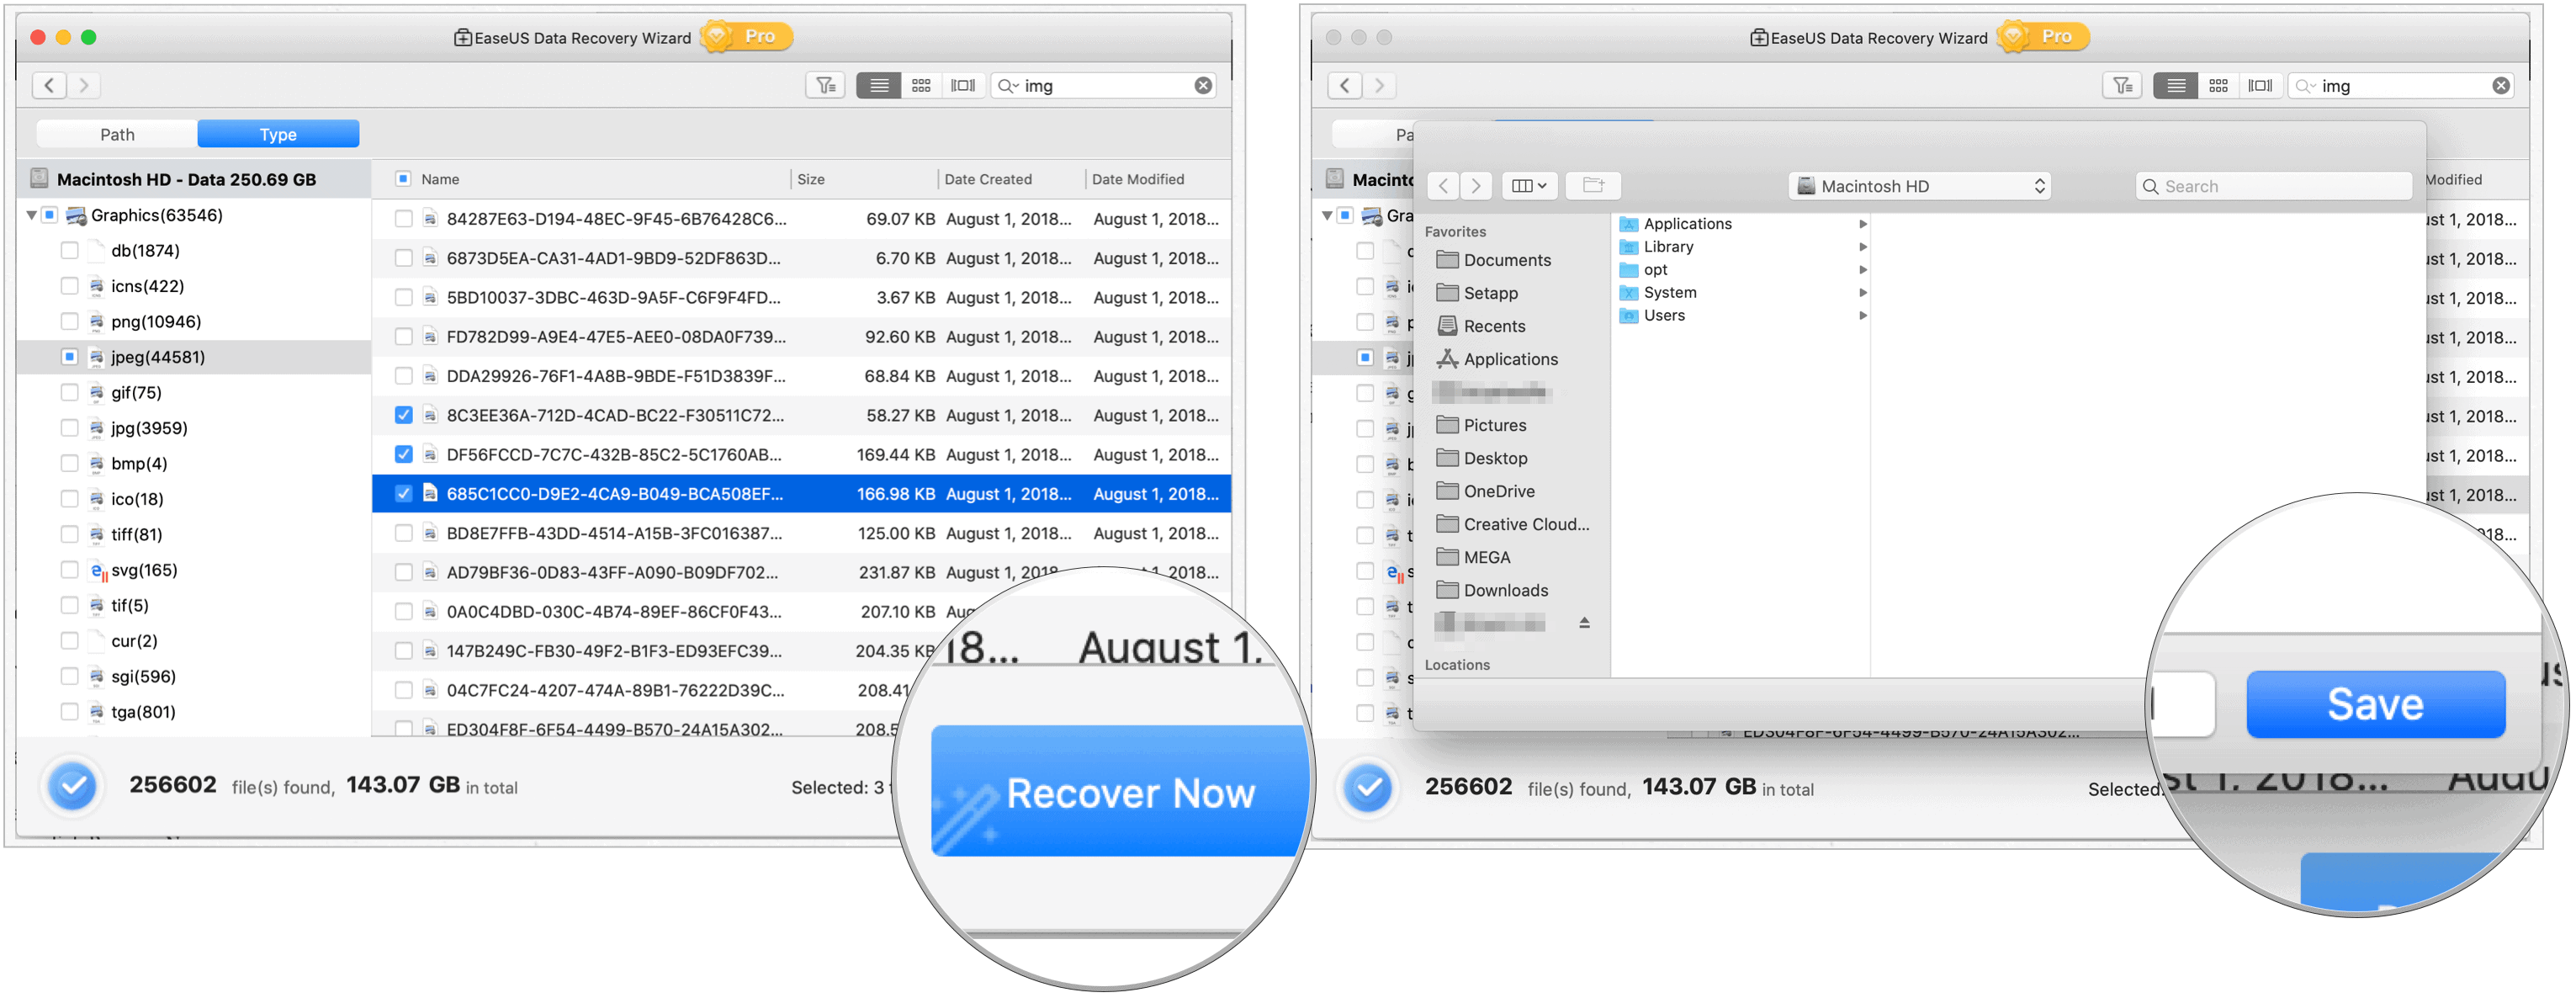
It’s strongly recommended, but not required, that you don’t save the file(s) on the same drive, but instead using a free cloud service like DropBox, Google Drive, or One Drive. Once you recover the (files), you can use them however you choose.
Saving Your Scan
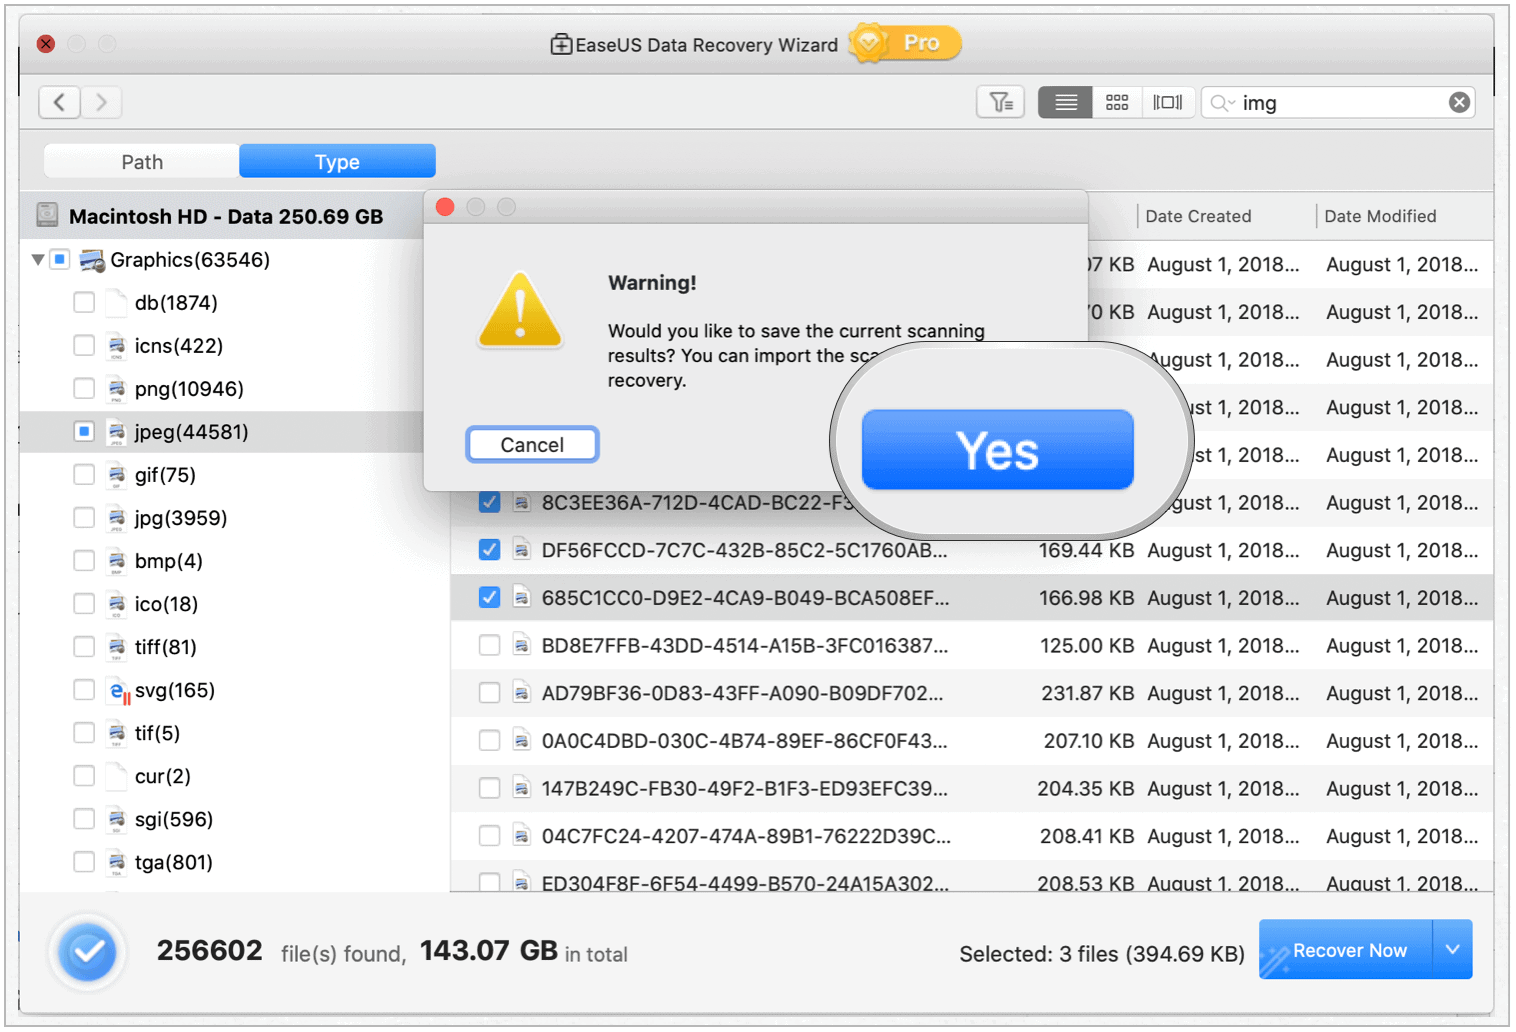
You should save your scan results, so you don’t need to re-scan every time you want to use EaseUS. Over time, these results will naturally get old as new files are added to your partition or drive. At a convenient time, re-run a scan.
When you exit EaseUS, you’ll be asked to save the scan. Click Yes to do so.
About the T2 Chip
The Apple T2 chip is a 64-bit ARMv8 chip that runs on a separate operating system called bridgeOS. First introduced on the iMac Pro (2017), the chip has been designed to better secure a Mac and protect it from potential security threats such as cold boot attacks or accidental data deletions.
The T2 chip has made it more difficult to recover data using third-party solutions such as EaseUS. However, the company says it has “successfully developed exclusive and safe data recovery technology to solve this issue. Users can efficiently and quickly restore deleted or lost data on new Mac computers in seconds. No technical experience required.”
EaseUS Pricing (and a considerable discount for gP readers)
EaseUS offers both a Free and Paid version of its popular Data Recovery Wizard for Mac. Although I focused on the Pro version in this review, the Free version also has many valuable features. EaseUS provides an excellent comparison of the features included in both the Free and Pro/Paid version of the product.
With that said, for a limited time, EaseUS has kindly agreed to give all groovyPost readers a significant discount of 74% off its flagship Pro version of Data Recovery Wizard for Mac. Usually $169.95, you can grab a copy now for $44.97 and receive Lifetime Upgrades and Free remote recovery services.

EaseUS Summary
Data recovery is much easier when using EaseUS. First launched in 2004, the tool continues to get better with each new release. Also available for iPhone, Windows, and Android-based devices, EaseUS is available through a free trial. Various Pro plans are available to unlock all of the EaseUS features.
Sponsored by EaseUS, the maker of Data Recovery Wizard for Mac


